Hitting the slopes from dawn till dusk to play in fluffy, fresh powder and race down corduroy groomers sounds like the perfect way to spend the day; however, it can take its toll on your body.
Sore legs and achy joints don’t have to be synonymous with your days on the slopes though, so we caught up with local yoga instructor and Yogacara studio founder, Emily Kane to get her tips on how to keep your body, mind and spirit in tip-top shape this winter.
“Nearly every winter season I end up with sore legs after the first day on the mountain. There are muscles that my body has forgotten how to use over the long days of summer even though I’ve stayed active with hiking and all sorts of other activities.
Although this post-shred soreness might seem inevitable, there are ways to prep your body so that it feels stronger and less sore afterwards. In fact, I rebounded with a quick recovery after opening day this year, which was partly due to certain postures included in my practice. I’m going to share these with you so that your body feels ready and willing to hit the slopes this winter season.” Emily Kane, founder of Yogacara Whistler.
Pre-Mountain Yoga Postures for Skiers and Snowboarders
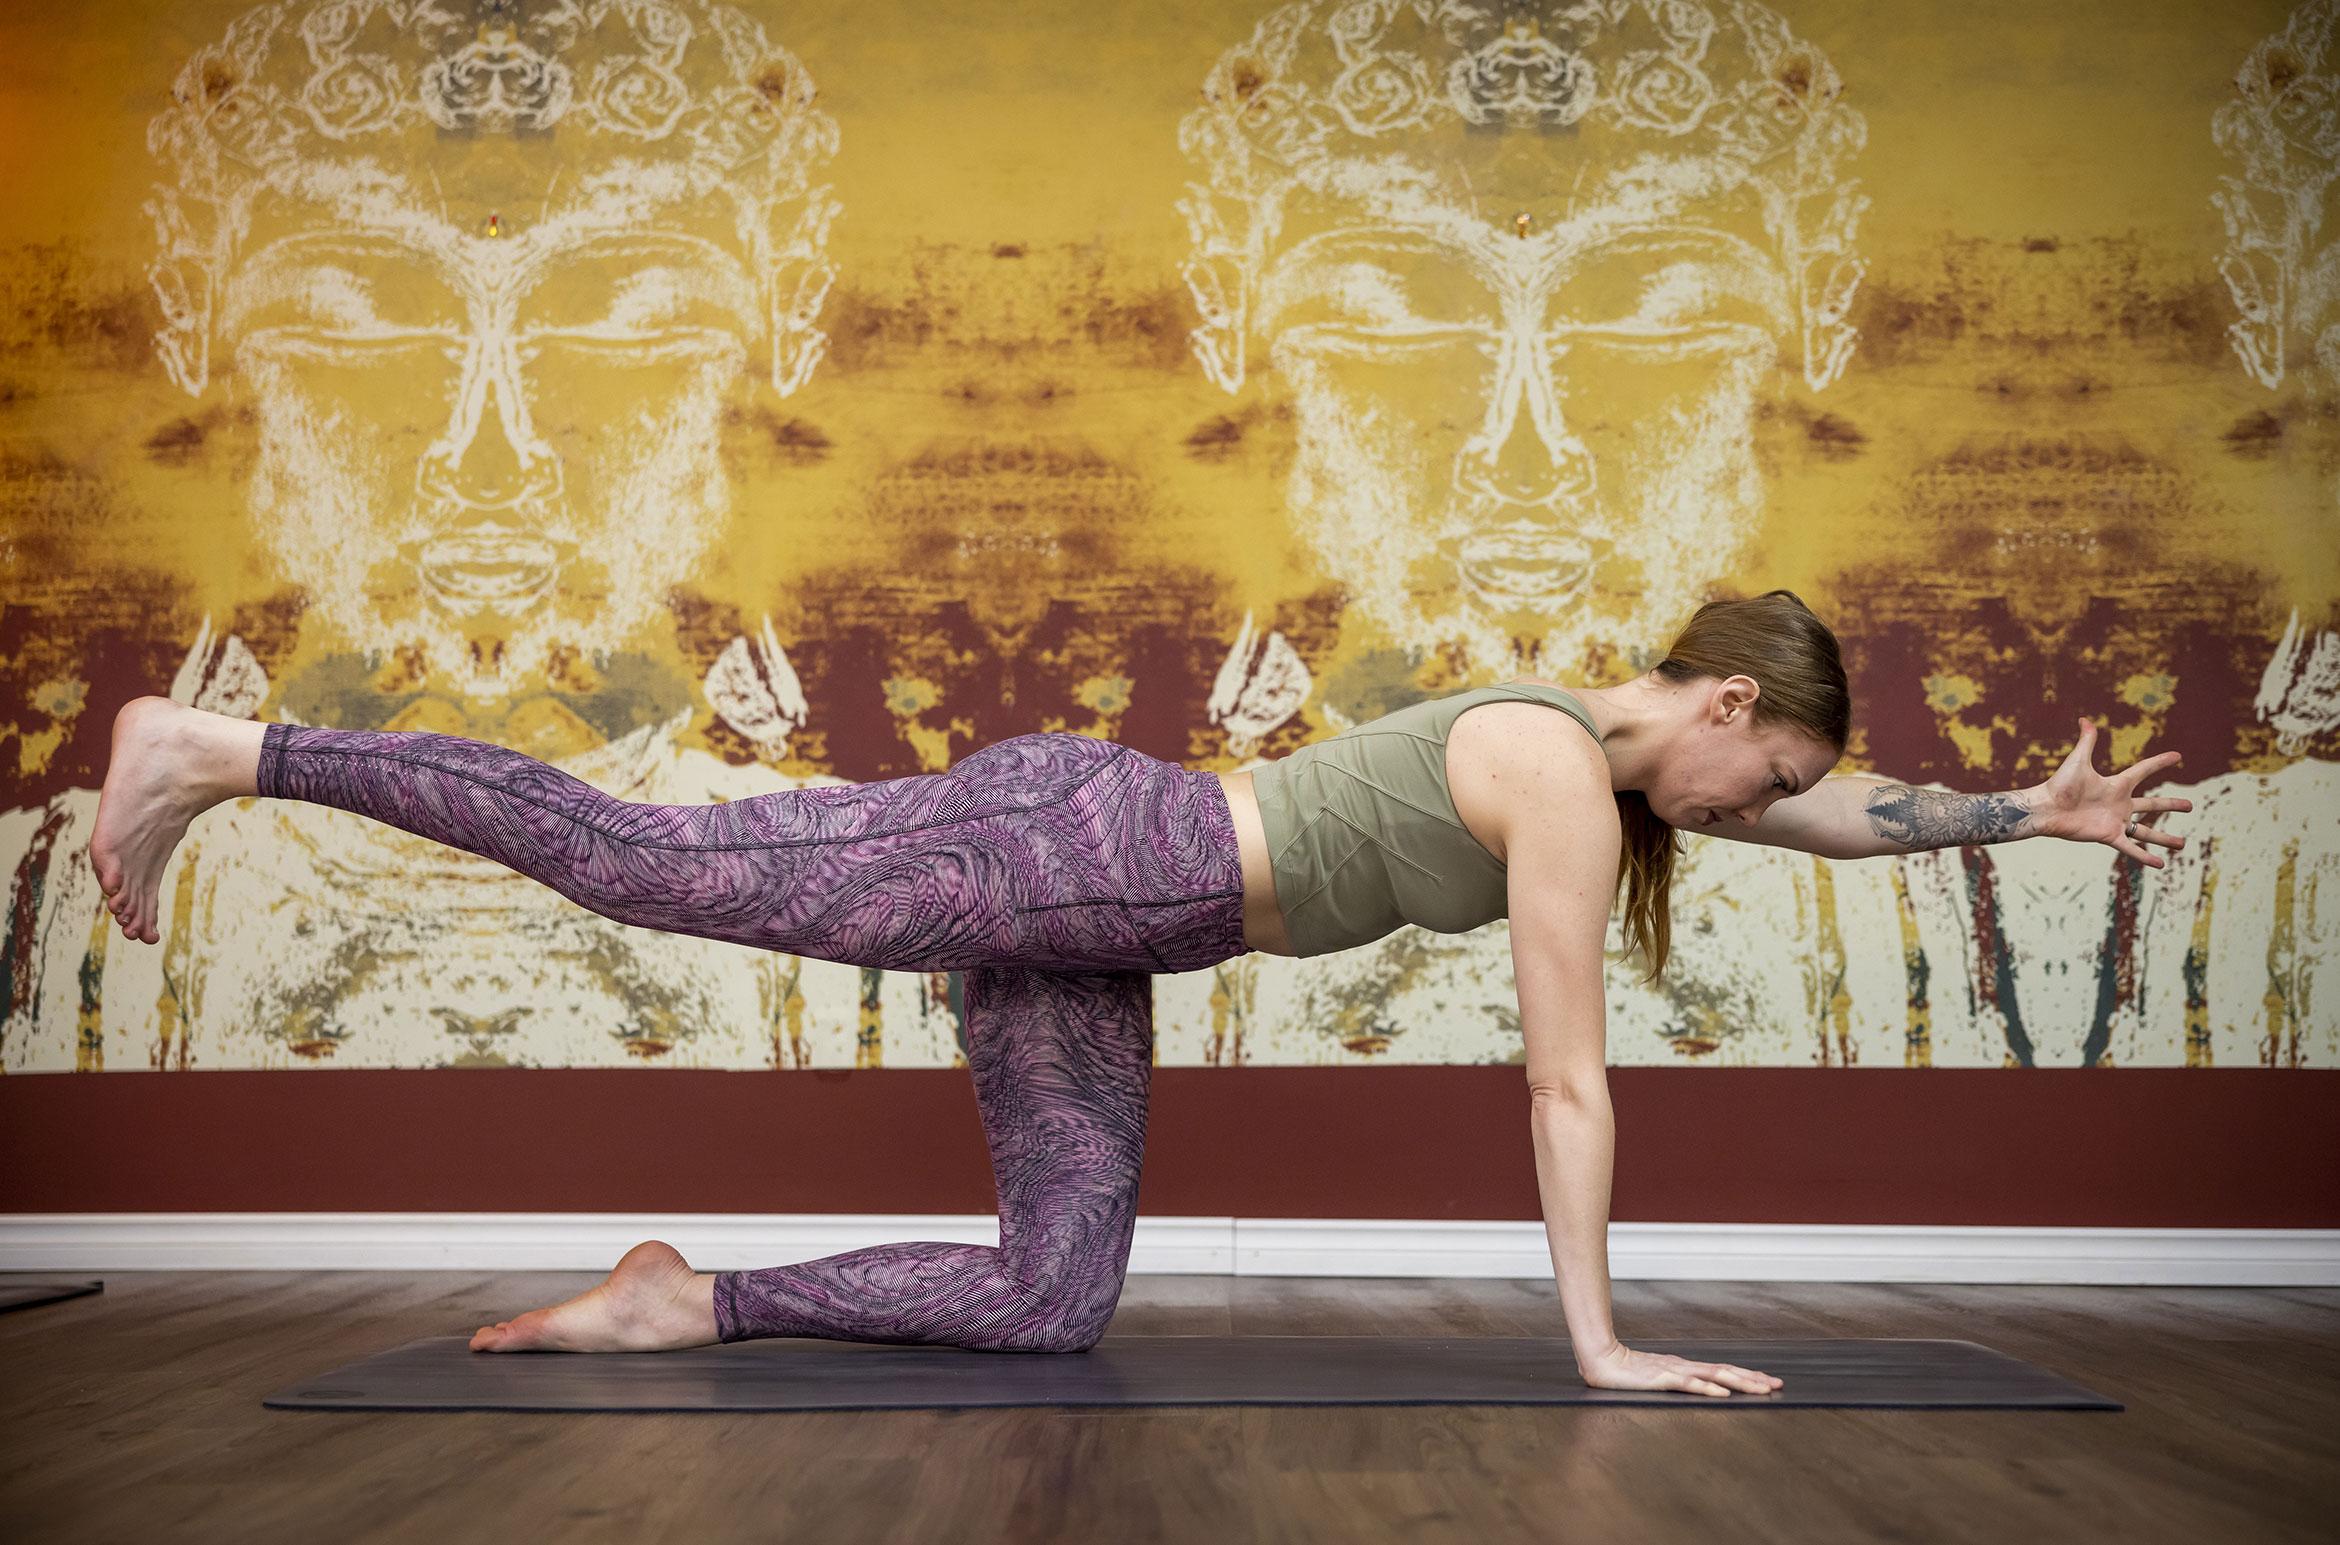
BIRD DOG
WHY: Core stability and coordination is essential for both skiing and snowboarding.
HOW TO: From all fours (i.e. wrists stacked underneath shoulders, knees underneath hips), as you inhale extend one arm in front of you and the opposite leg behind you in line with your hip. Flex your foot (toes pointing down) to press out through your heel.
Maintain the strength in your back leg. Lengthen your tailbone back and connect to the support of your core. Draw your shoulders away from your ears and keep the back of your neck long. Inhale and exhale steadily through your nose, taking five to 10 breaths on each side.
INJURIES: If you have a knee injury, place extra padding underneath your supporting knee (like a blanket).
WATCH FOR:
- Your hips hanging to one side; hug them in and draw your back inner thigh skyward.
- Shoulder sinking; actively press your palm in the mat and broaden across the back of your shoulders blade; turning the pinky down on your outstretched arm can help open up your shoulder.
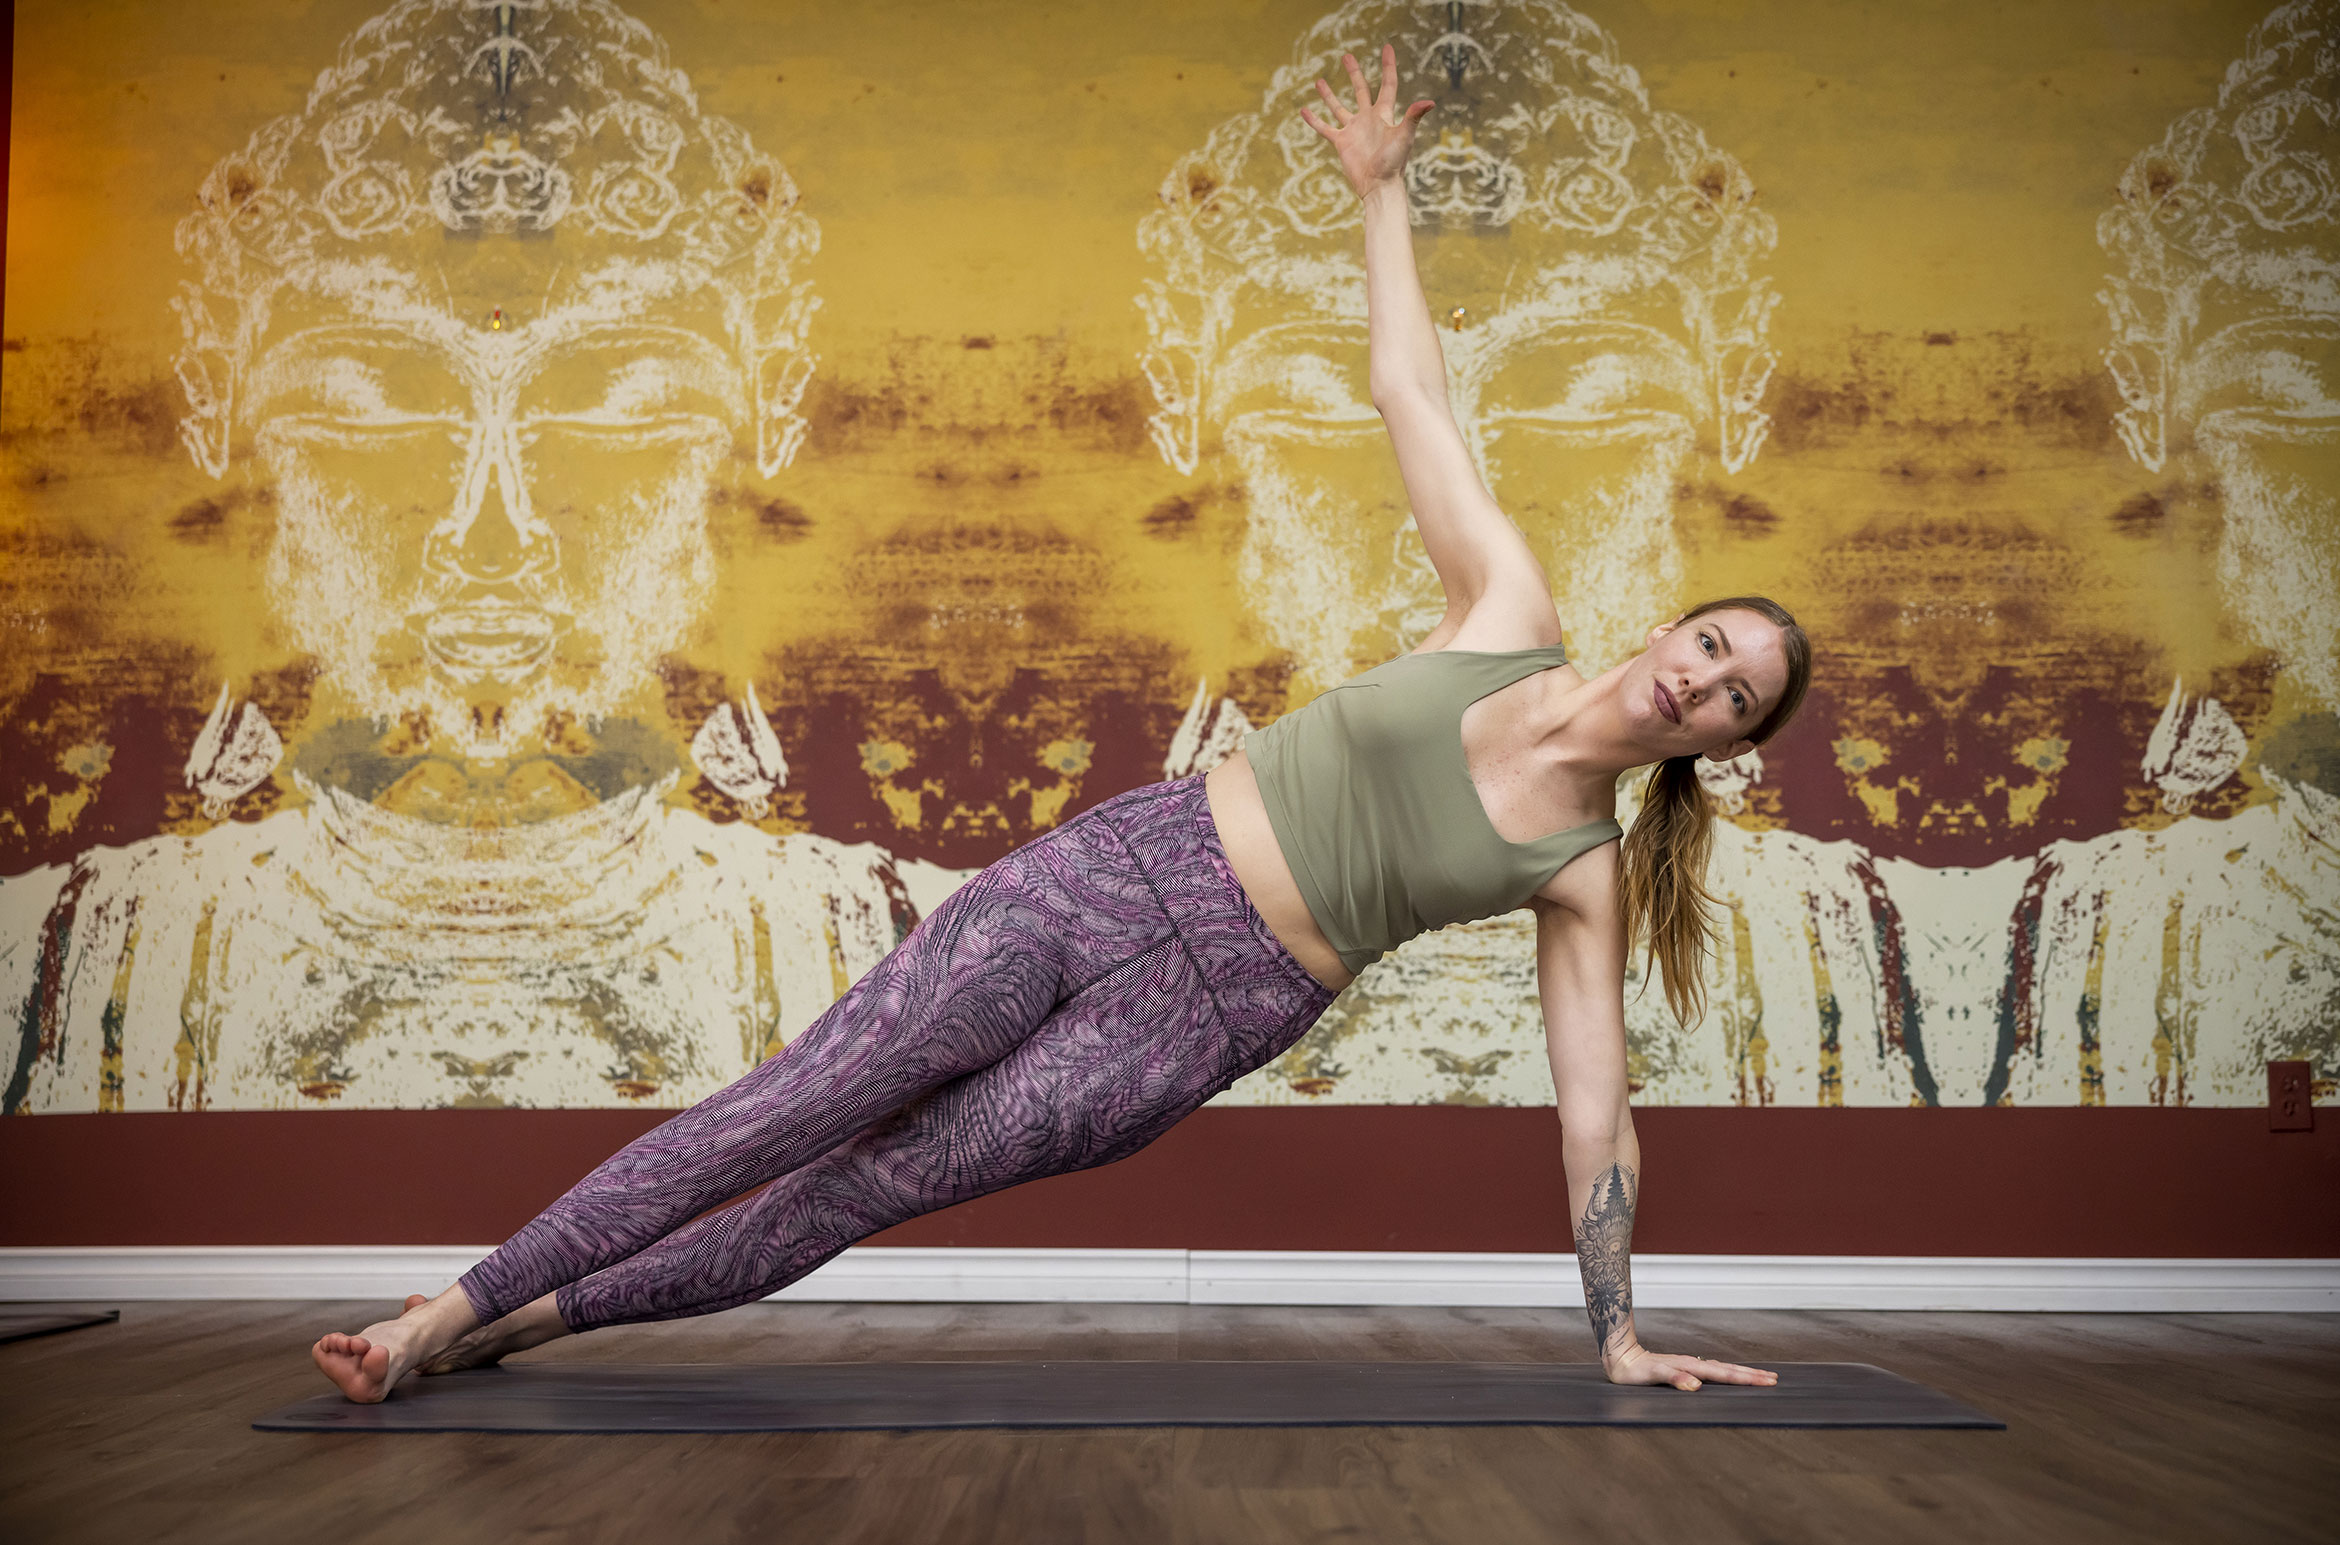
SIDE PLANK
WHY: A strong core keeps you stable, assists your technique and prevents injuries like back pain.
HOW TO: From a regular plank, plant your right hand on the mat under your heart, spin both toes to the left, and as you inhale reach your left arm to the sky. Feet can be stacked or staggered. Take five to seven breaths then transition to the other side.
VARIATIONS FOR INJURIES:
- If you have a wrist injury, lower down to your elbow or bring your bottom knee down to the mat.
- If you feel unstable, try lowering your bottom knee down for extra support.
WATCH FOR:
- Accidental back bending (especially for flexible people). If you notice this, hug the front of your ribs in and bring your tailbone towards your feet to engage your core muscles.
- Shrugging shoulders. Press down through your bottom hand and send your shoulders away from your ears. Create space between your shoulder blades as you reach up and out with your top hand. If this feels like too much for your shoulder, place your bottom knee on the mat.
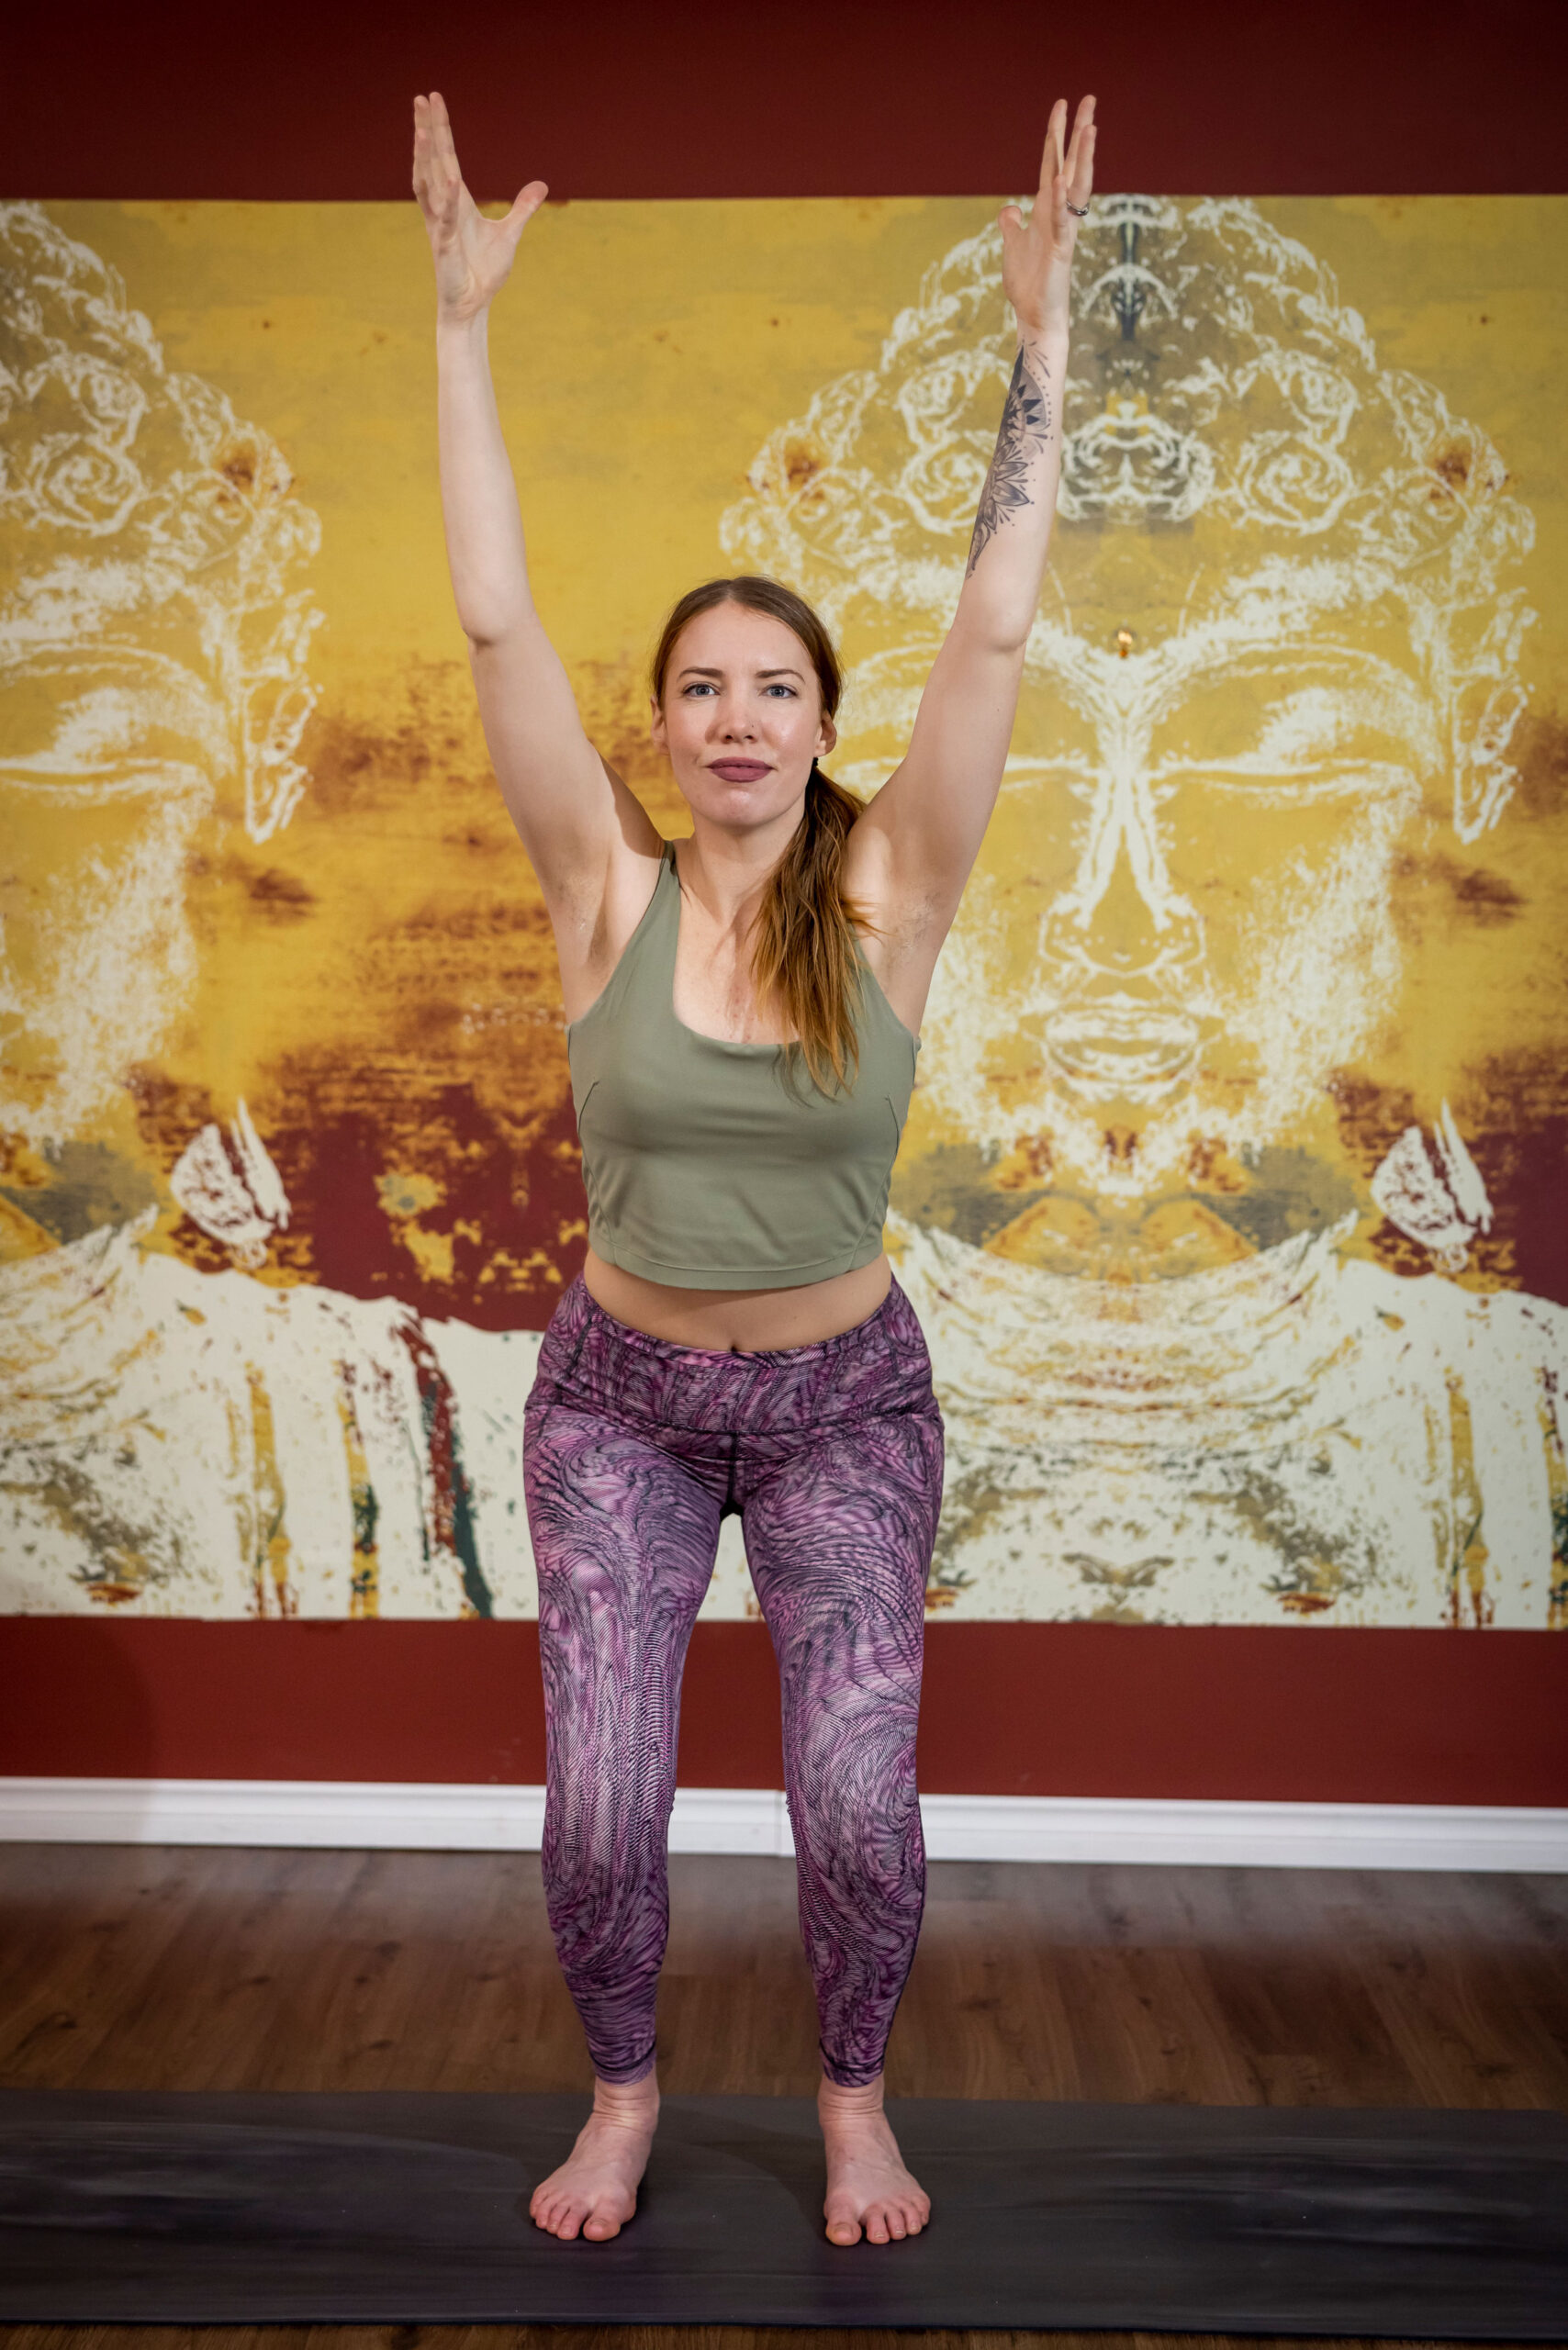
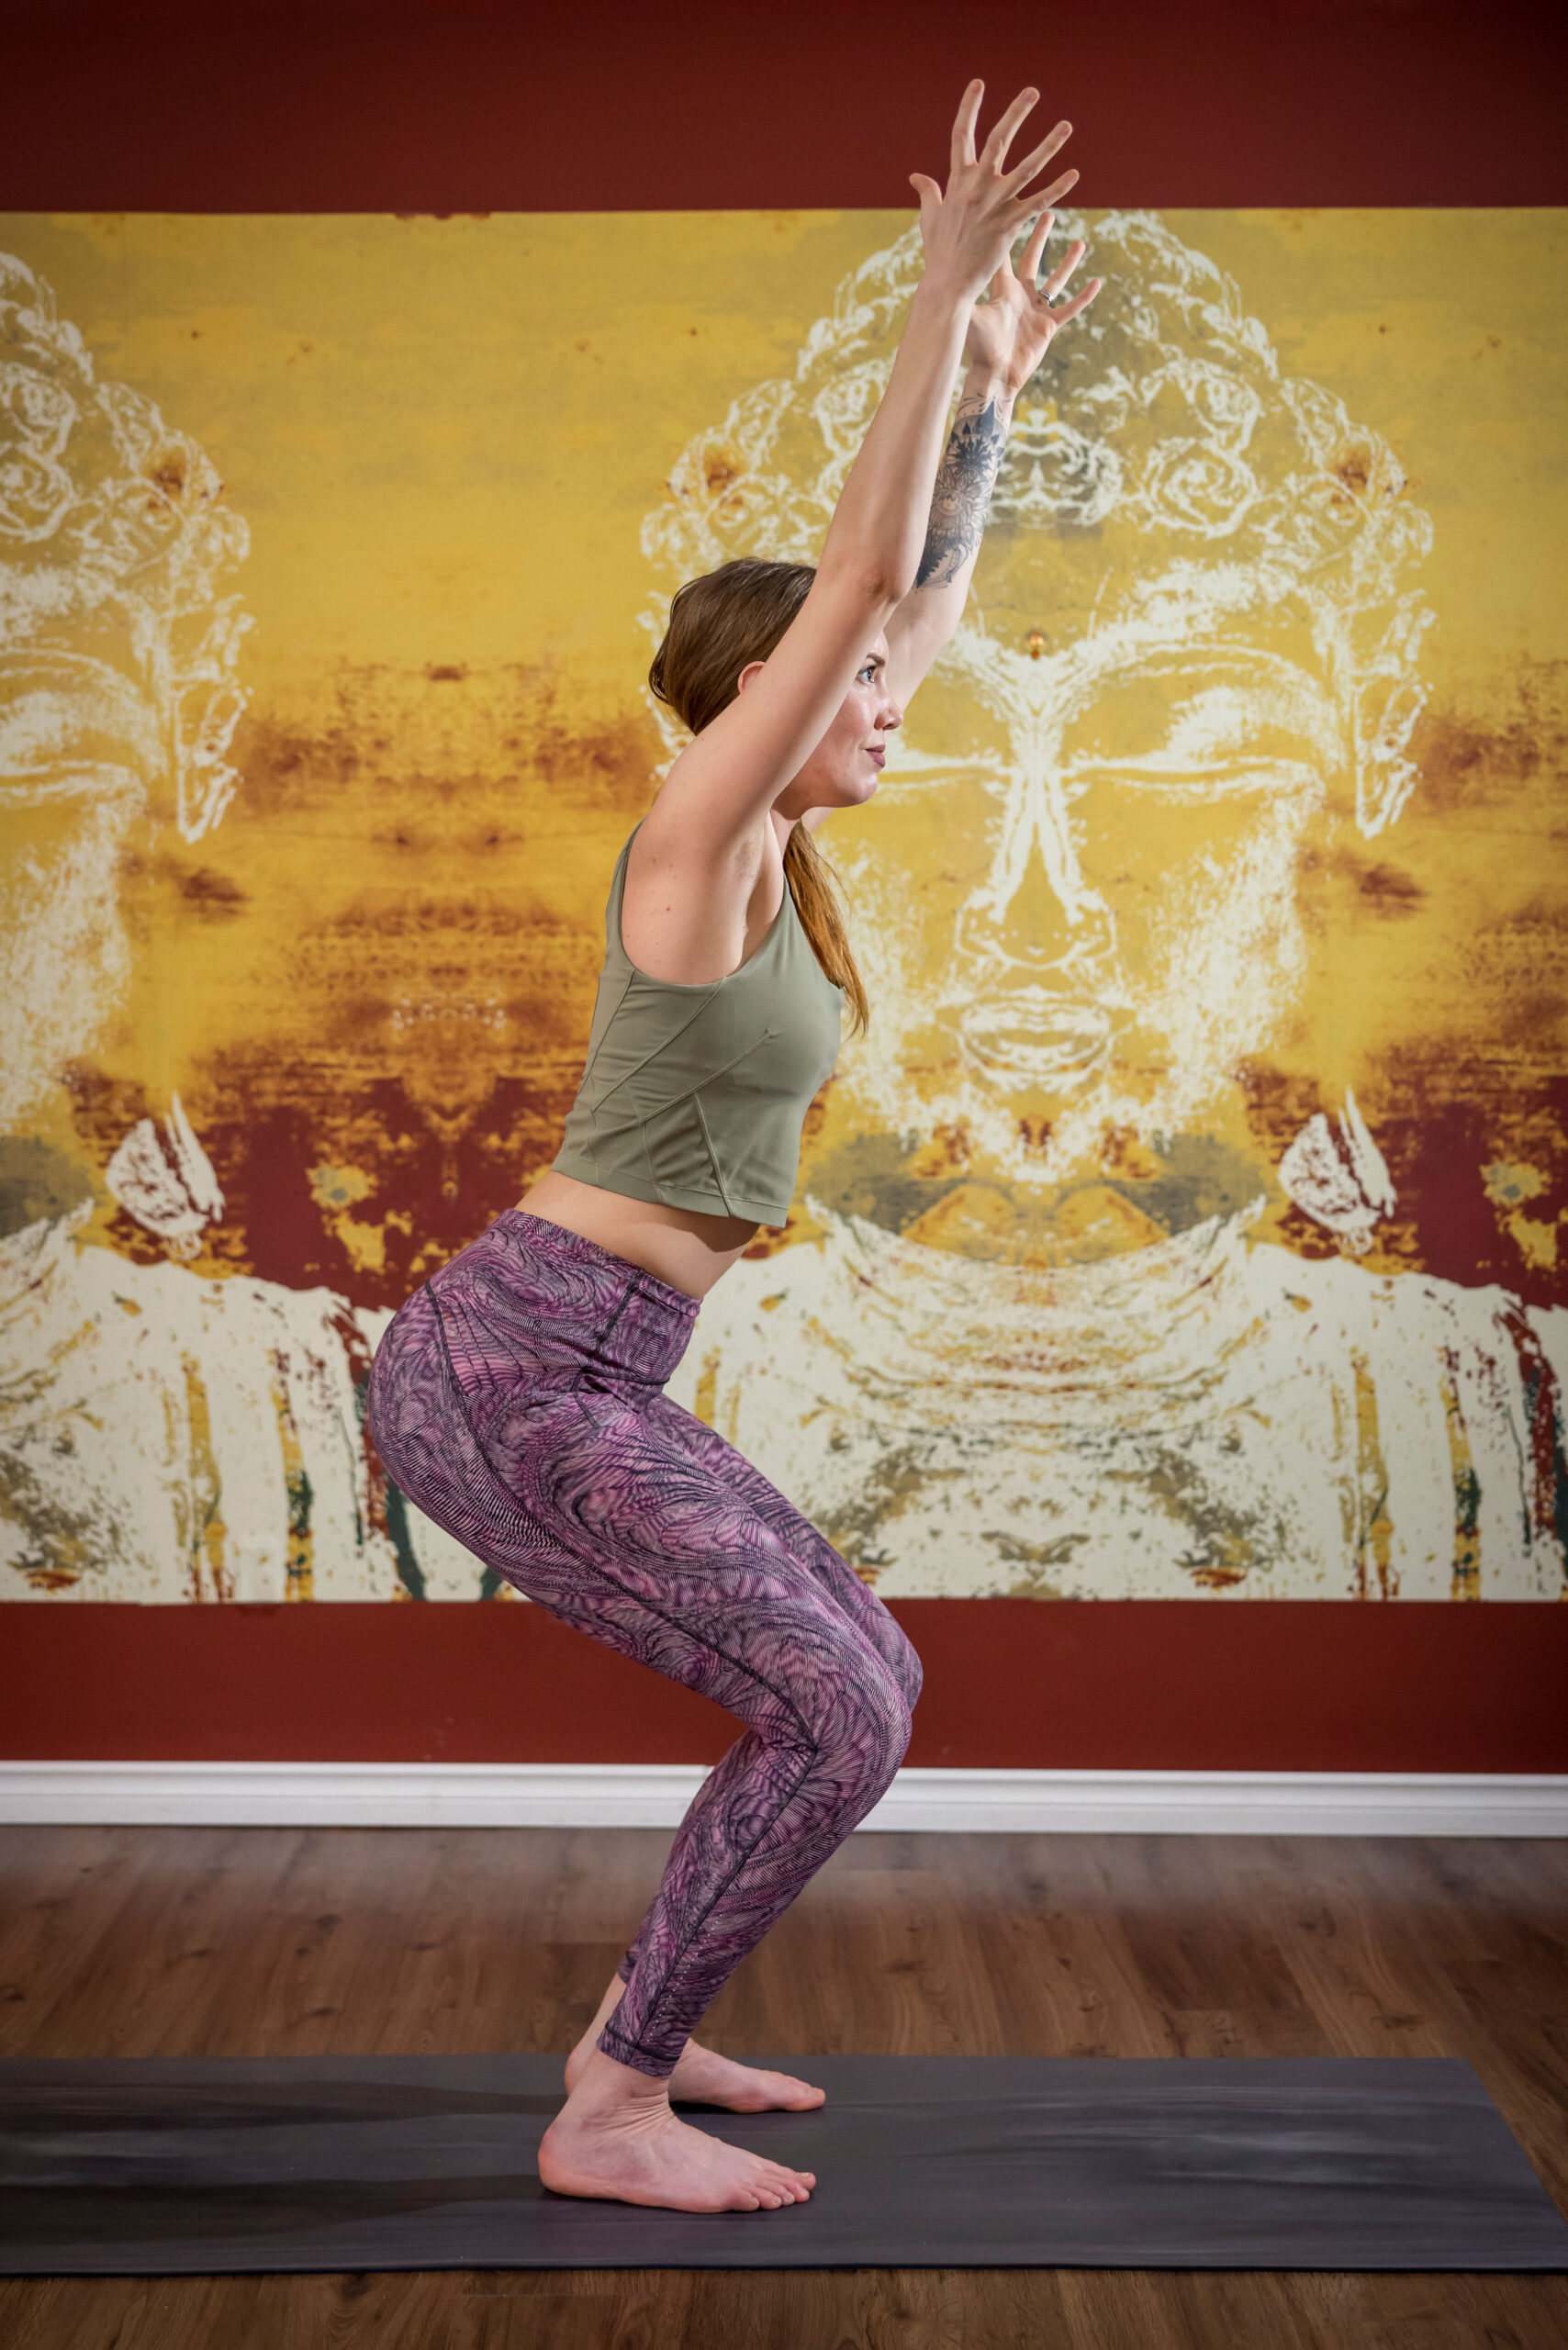
CHAIR
WHY: Your lower body (your legs and glutes) is essential to both skiing and snowboarding, and the strength of those muscles will impact your technique.
HOW TO: Stand with feet either together or hip distance apart, toes and knees pointed forward. Exhale as you sink your hips back, bringing your weight slightly back into your heels as you bend your knees (as if you’re sitting on a chair).
Inhale, reach your arms forward and up. Spin your pinky fingers down and open up across your shoulders. Send your gaze up (if that works for your neck).
VARIATIONS FOR INJURIES: If you have knee or ankle injuries, just be mindful of how deep you sit in your imaginary chair.
WATCH FOR:
- Knees splaying in or out. Keep them pointing forward, in line with your toes.
- Weight too far forward in your toes (keep it back).
- Pelvis tucking or tilting forward; let your pelvis stay neutral.
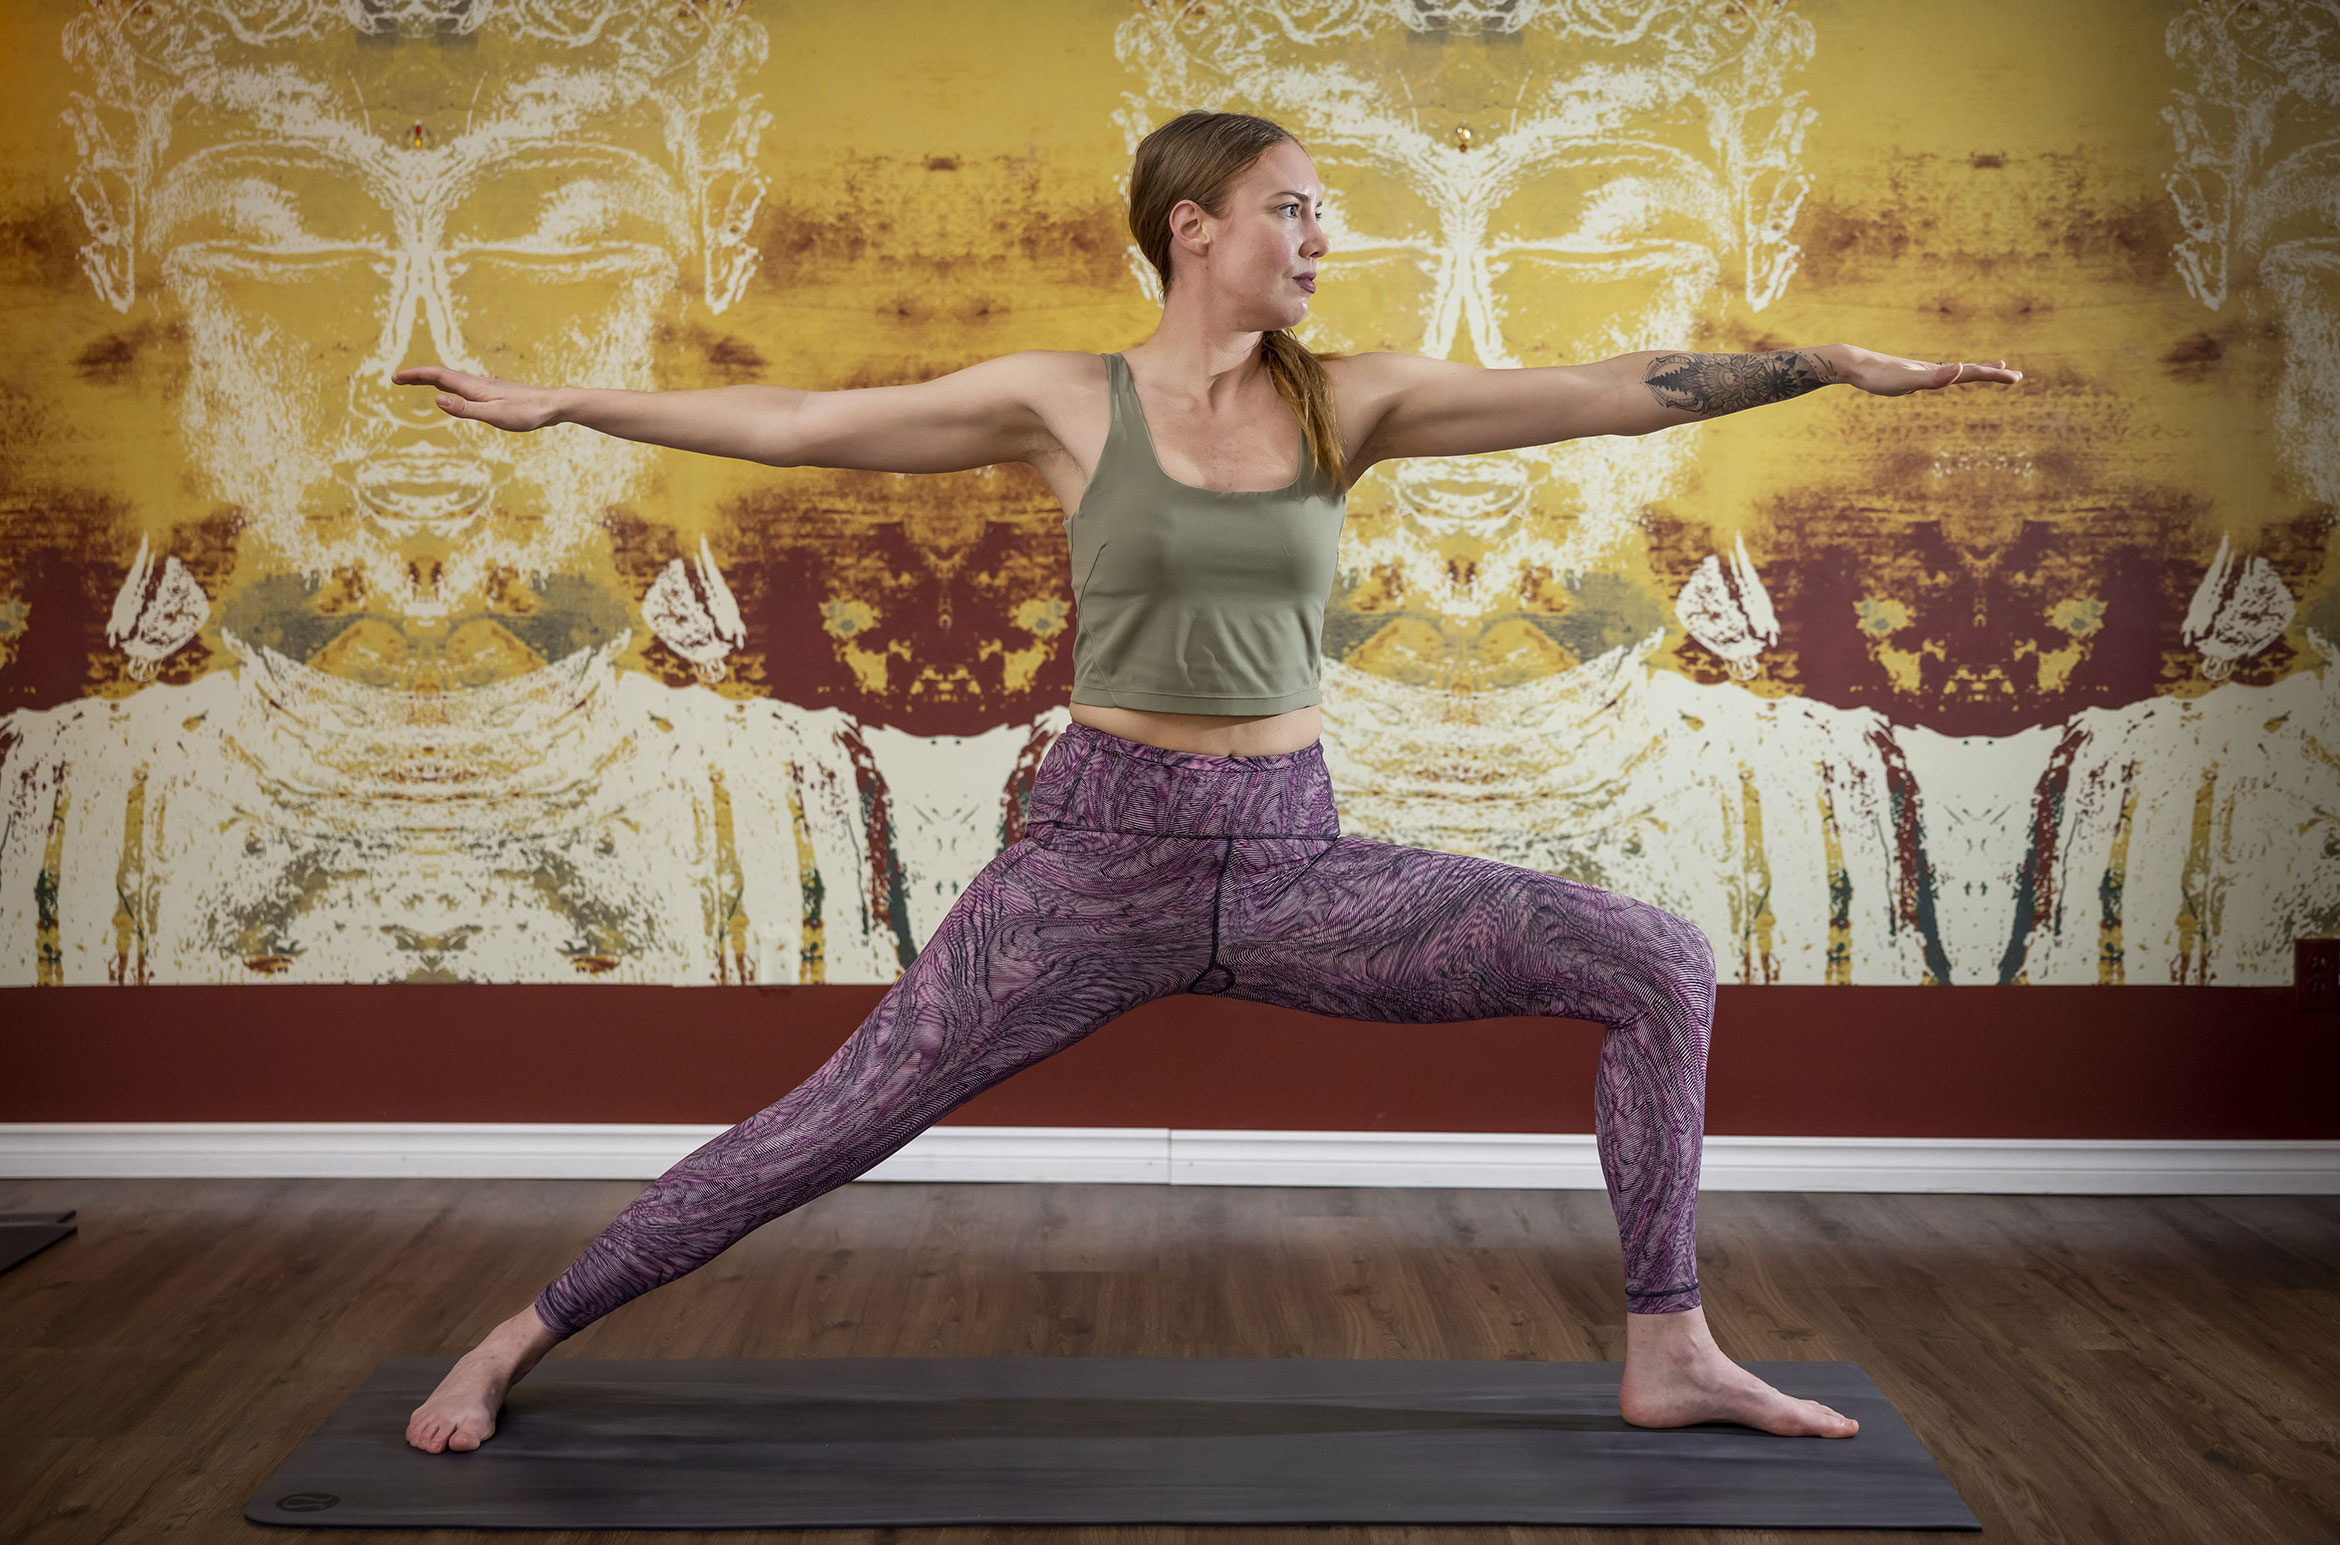
WARRIOR TWO
WHY: The strength that you gain from this posture will help you in those thigh burning moments on the mountain. This posture also supports your overall balance and stability.
HOW TO: From standing, take a long step back with one foot and set your feet wide on your mat. Turn your hips to the side. Pivot your front foot forward (towards the top of your mat) and point your back foot slightly inwards (about a 45-degree angle). Line the heel of your front foot up with the inside edge of your back foot.
Bend your front knee so it stacks overtop of your ankle, then, as you inhale, sweep your arms out wide. Your front leg rotates outwards, as your back leg rotates inwards. Keep pointing your tailbone down as your shoulders stay stacked overtop your pelvis. Draw your shoulder blades down away as you lengthen through your arms and fingertips (palms down). Gaze out over your front hand.
VARIATIONS FOR INJURIES:
- If you have a knee or hip injury it might feel better to take a shorter stance.
- If the position feels wobbly, play with the stance of your feet. That might mean moving your front foot to the left or right.
WATCH FOR:
- The back knee and toe pointing different directions (make sure the toes and knee are pointing the same way).
- Front knee rolling in (press into the outside edge of your front foot).
- Leaning too far forward or back – keep your ribs stacked over your hips.
Post-Mountain Yoga Postures for Skiers and Snowboarders
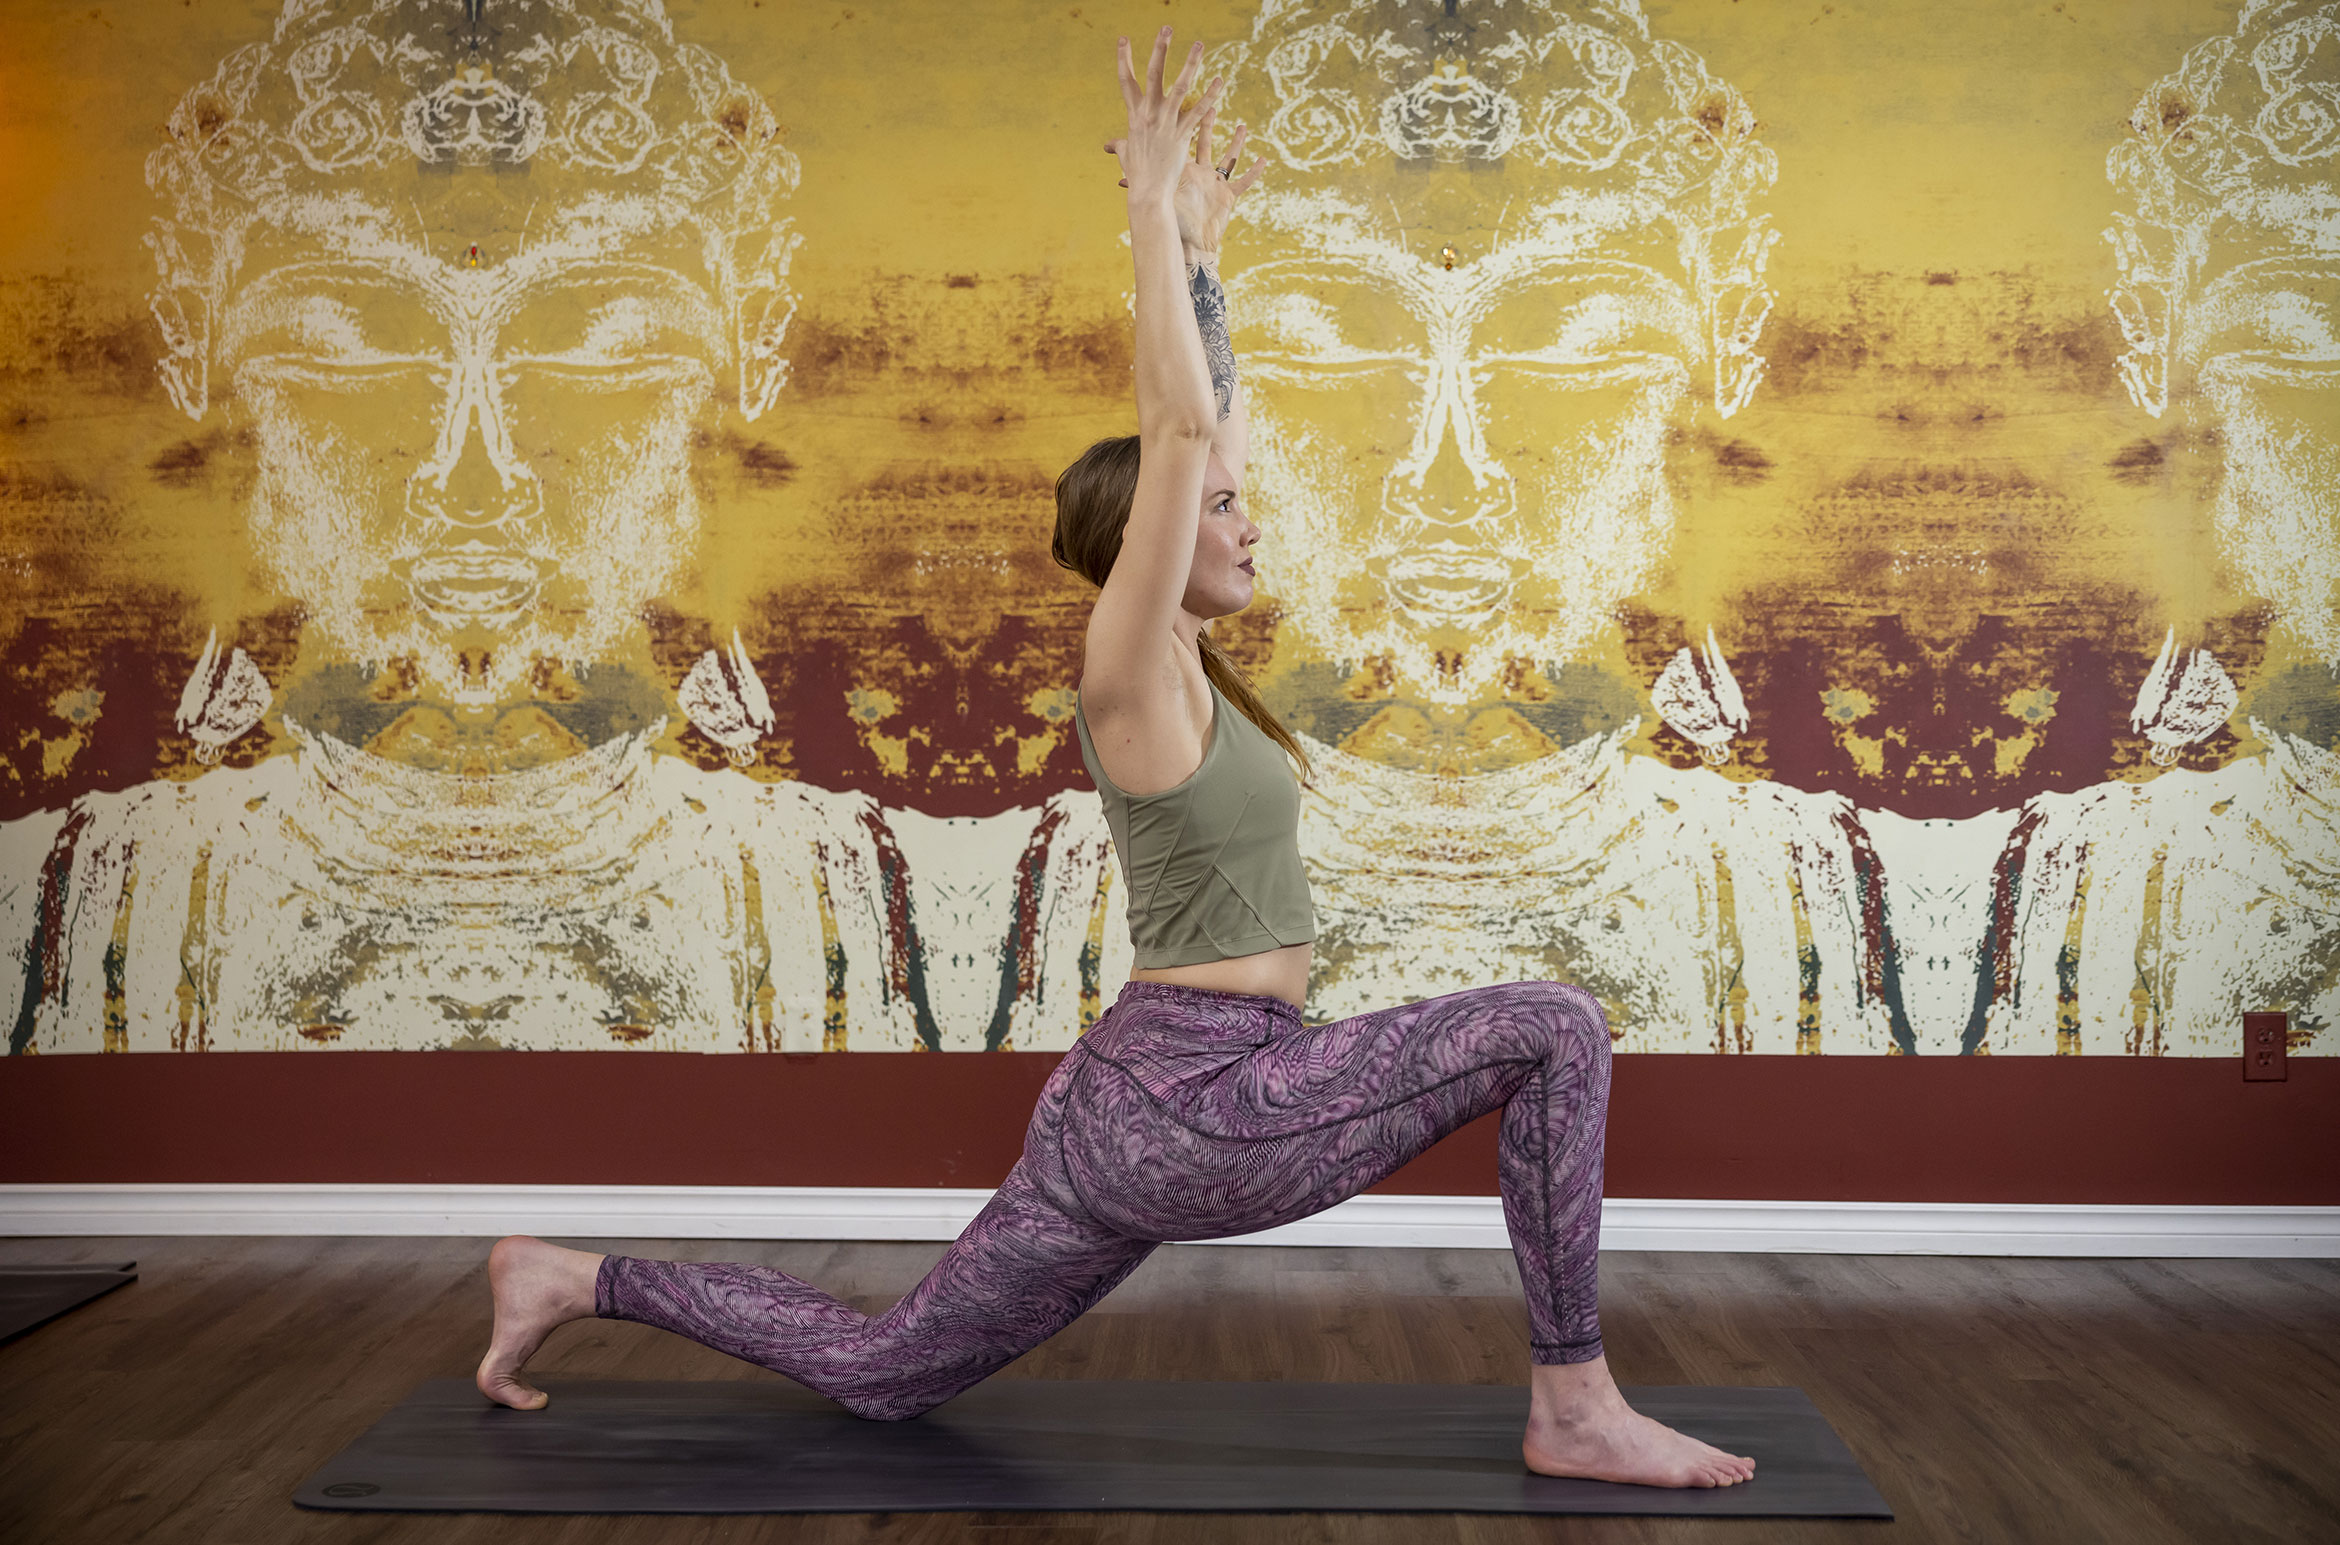
LOW LUNGE
WHY: Our hip flexor (iliopsoas) is not just a muscle used in our lower body, but it also acts as a core stabilizer. A day of skiing or riding can tax this muscle from the multitude of roles it plays in movement and stability.
HOW TO: From a standing forward fold near the top of the mat, take a long step back with one foot and lower your back knee down. Your back toes can be tucked or untucked (whatever feels better for your knee).
Lean your hips forward while keeping them engaged. A few options: keep fingertips on the mat, place your hands on the front of your thigh, or reach them skywards. Stay for 10 to 15 breaths on each side.
VARIATIONS FOR INJURIES: For knee injuries it can feel better to place something soft underneath your back knee like a blanket
WATCH FOR:
- Hips leaning to one side (keep your hip muscles engaged).
- Knee rolling in or out (keep knee pointing forward in line with your toes).
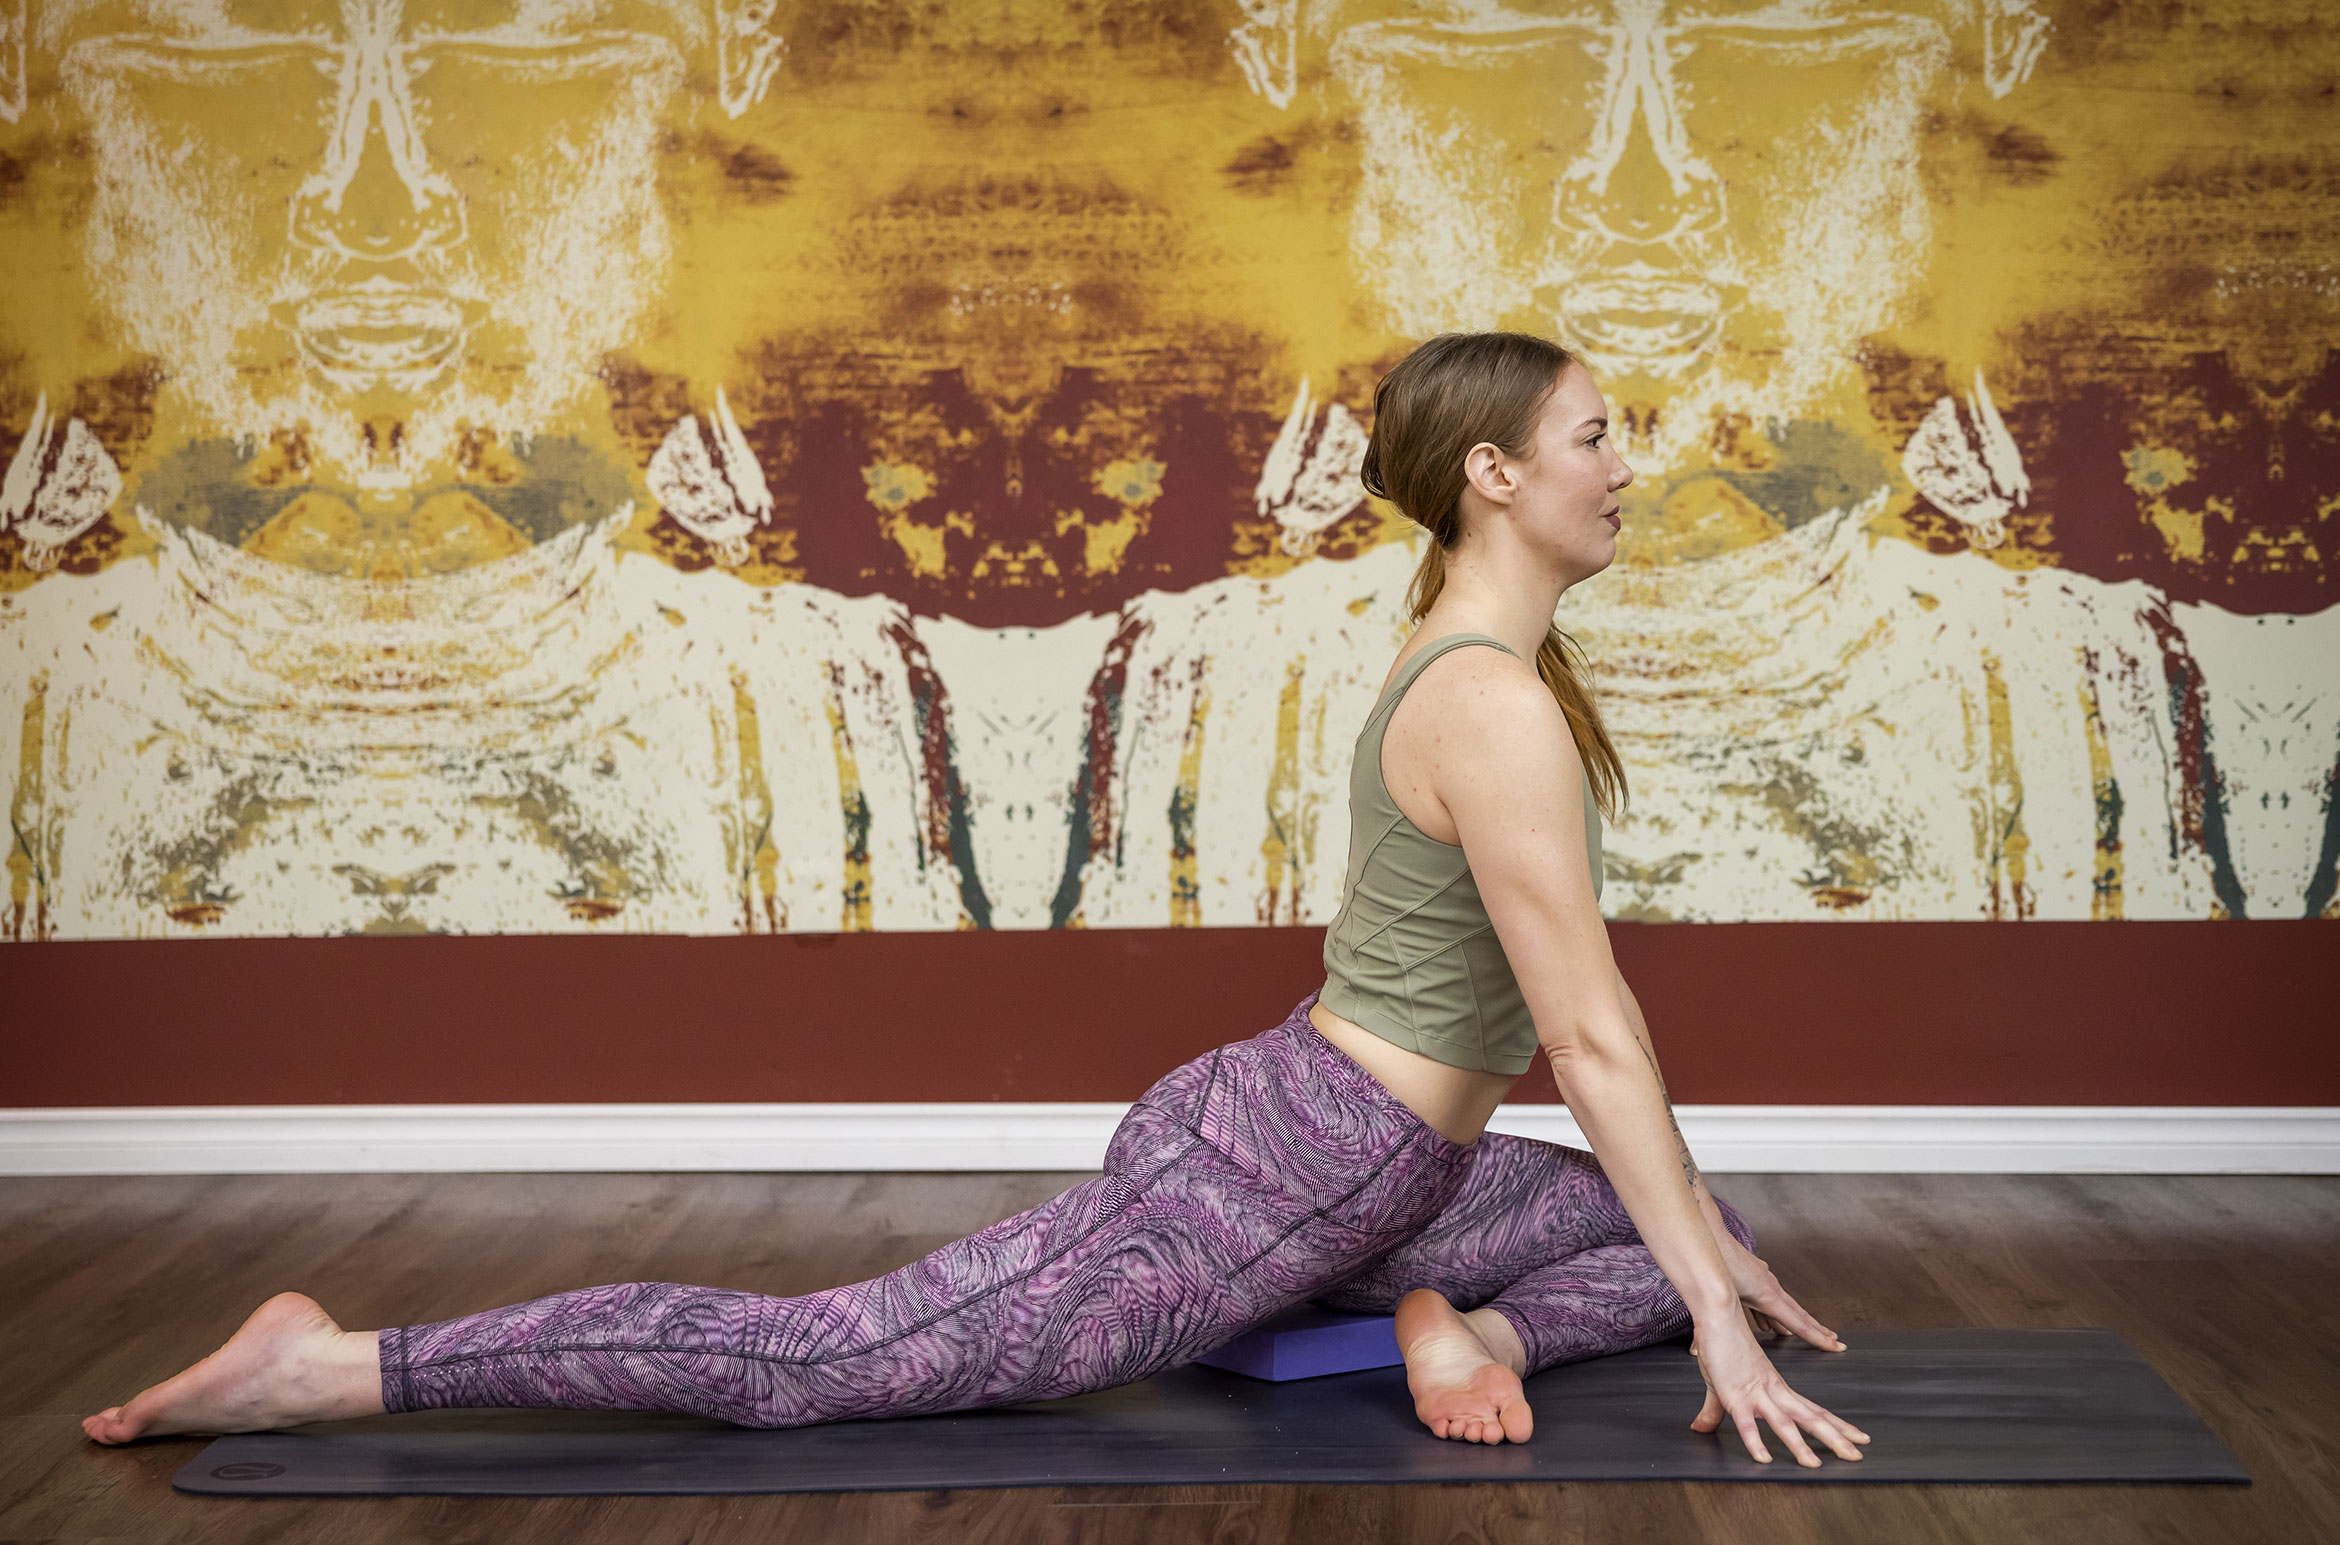
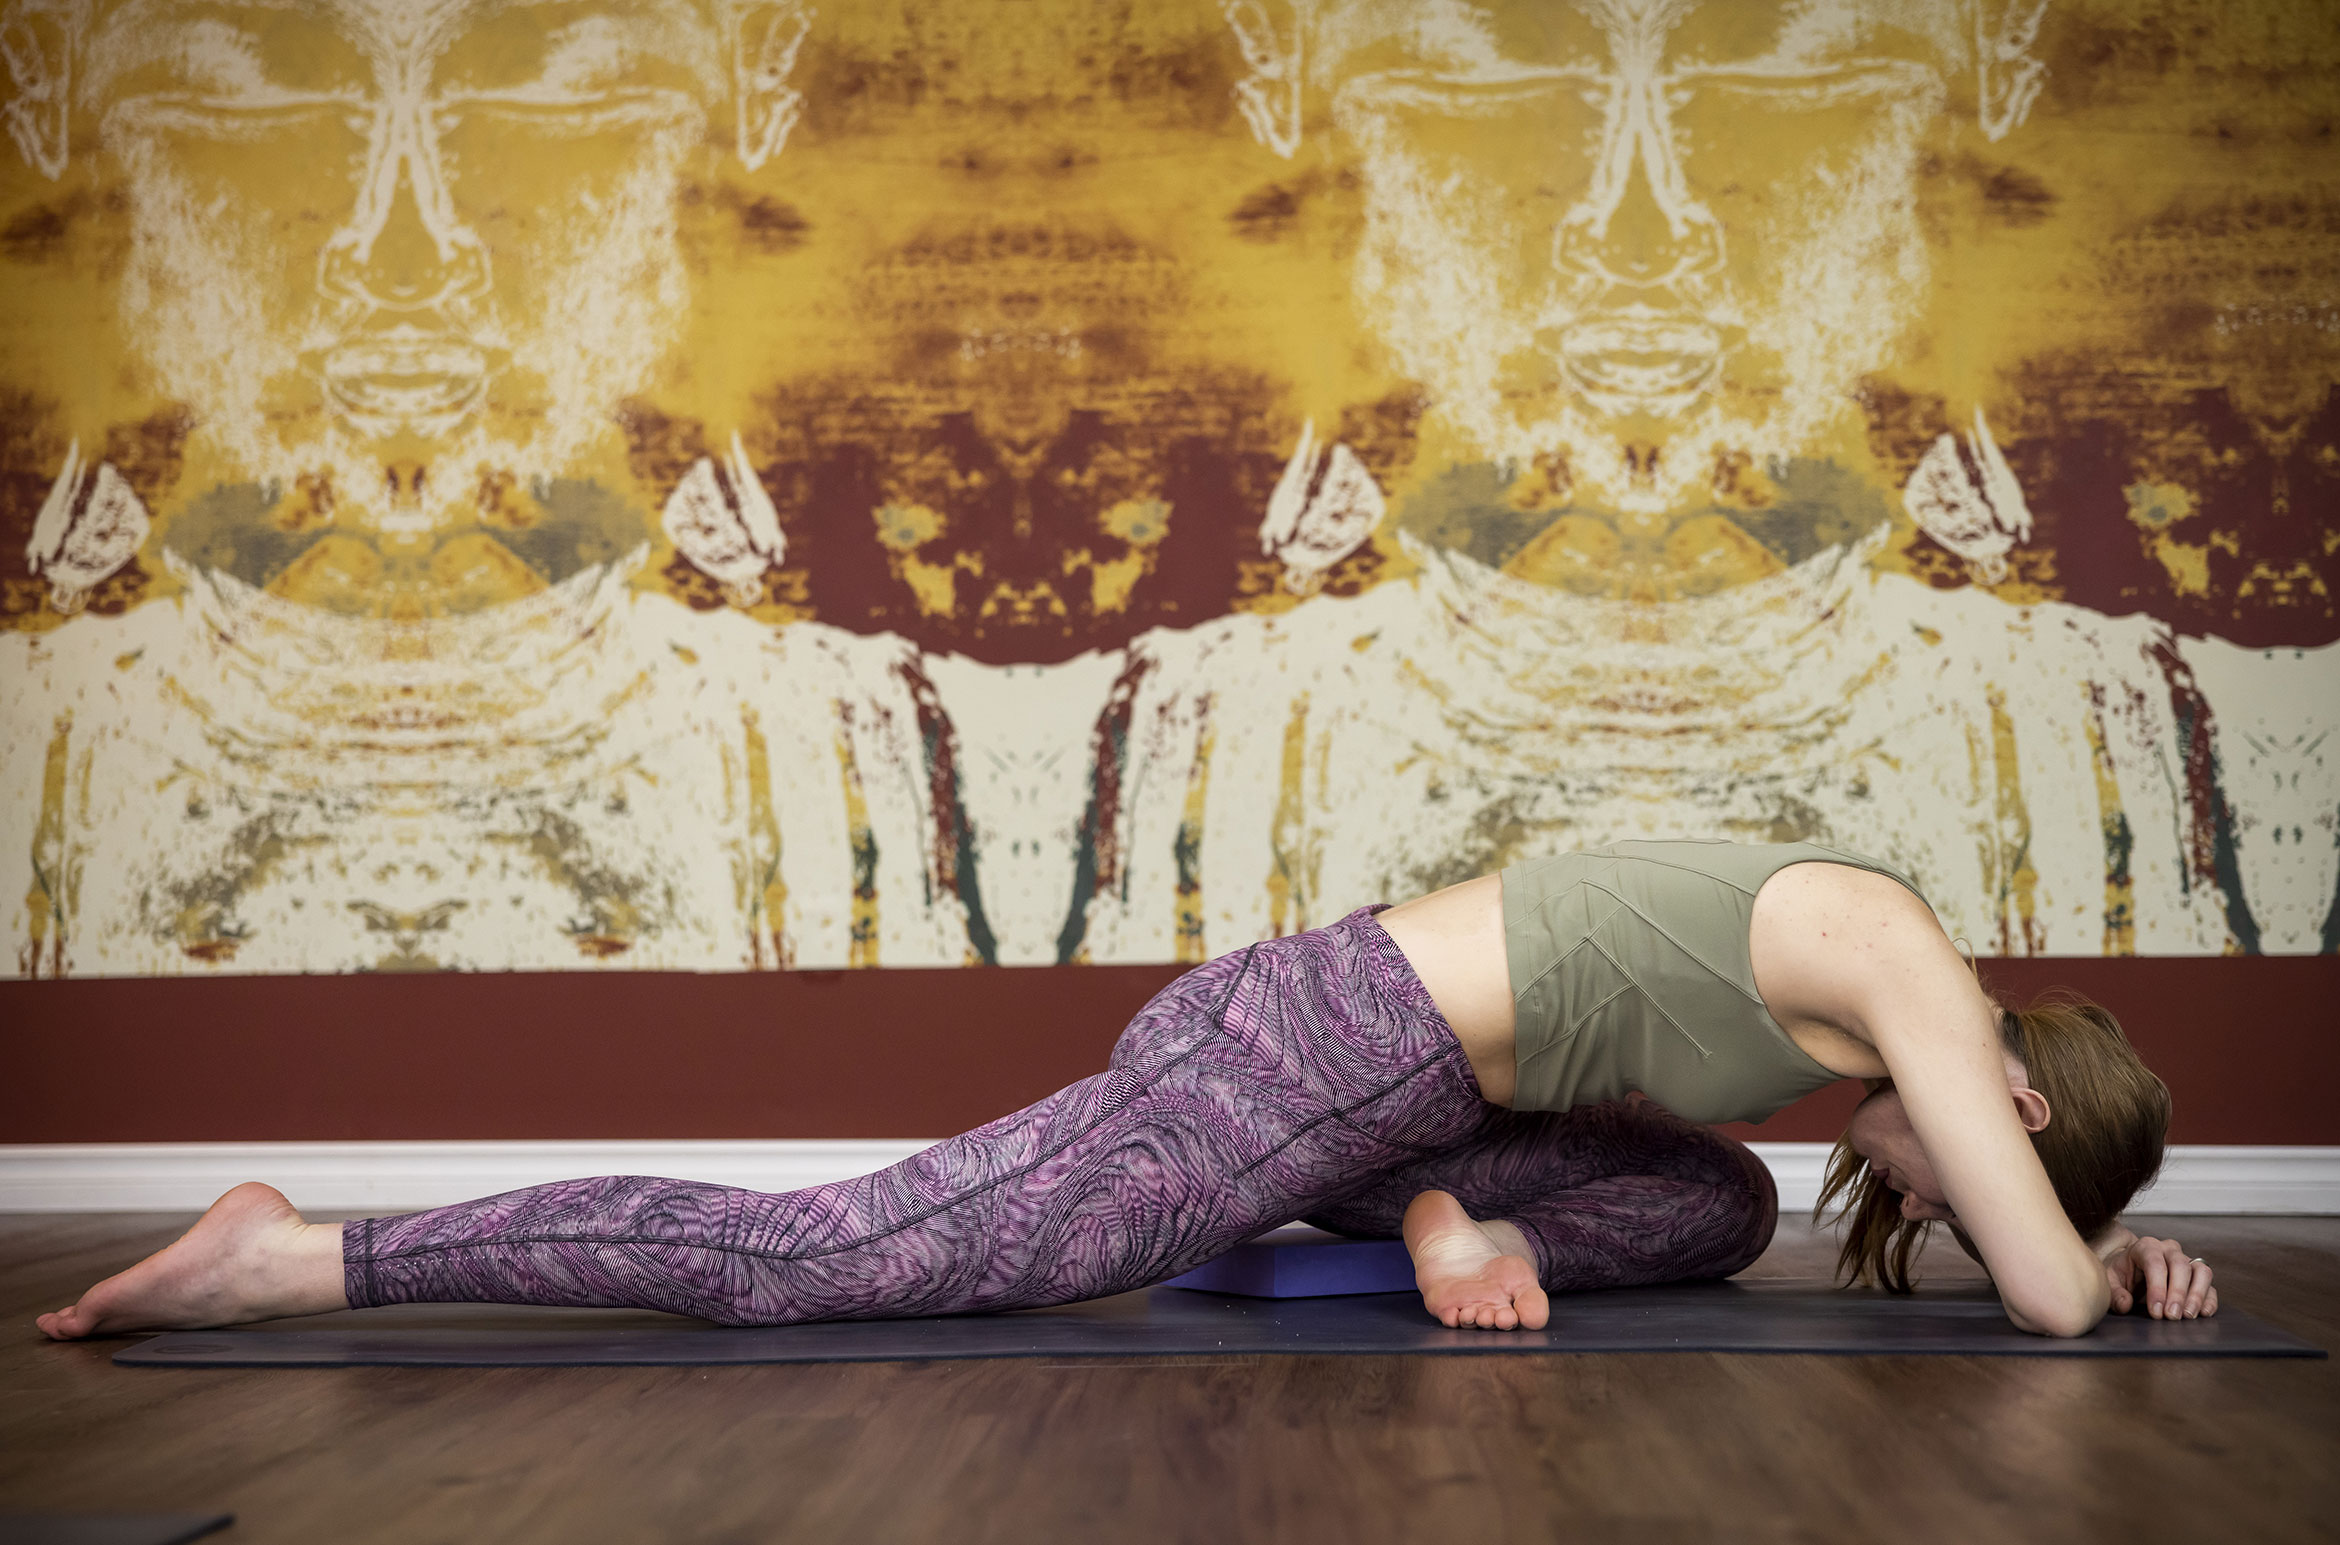
PIGEON
WHY: It’s another posture that gets into your psoas (hip flexor), while also being a release for the TFL (tensor fasciae latae), a muscle that provides hip and knee stability. Skiing and snowboarding make this area prone to chronic tightness, so this is a must-do.
HOW TO: From downward facing dog, rest your right knee behind your right wrist. Make sure your front foot stays on the inside of your thigh. Keep your hips centered as you heel toe your back foot further and rest the top of your foot on the ground.
Stay upright on your fingertips (especially if you’re looking for more psoas release on your back leg) or bow forward to take your forehead onto stacked hands or your mat. Take long, steady breaths and stay for 7 to 15 breaths on each side.
VARIATIONS FOR INJURIES: If you have knee or ankle injuries, you can practice this lying down on your back. Cross your ankle just above your opposite knee, then open up your hip (knee comes out wide).
WATCH FOR:
- Hips shifting to one side. Stay in the center (a block underneath a raised hip is a great plan).
- Front knee is set too narrow (in line with your body when you bow forward) take it out wider to get more of a release in your outer hip (TFL, IT band)
- Back leg is rotated, which can put pressure in your lower back (SI joints). Notice the rotation of your back leg and if it’s rolling out, bring your back inner thigh skyward.
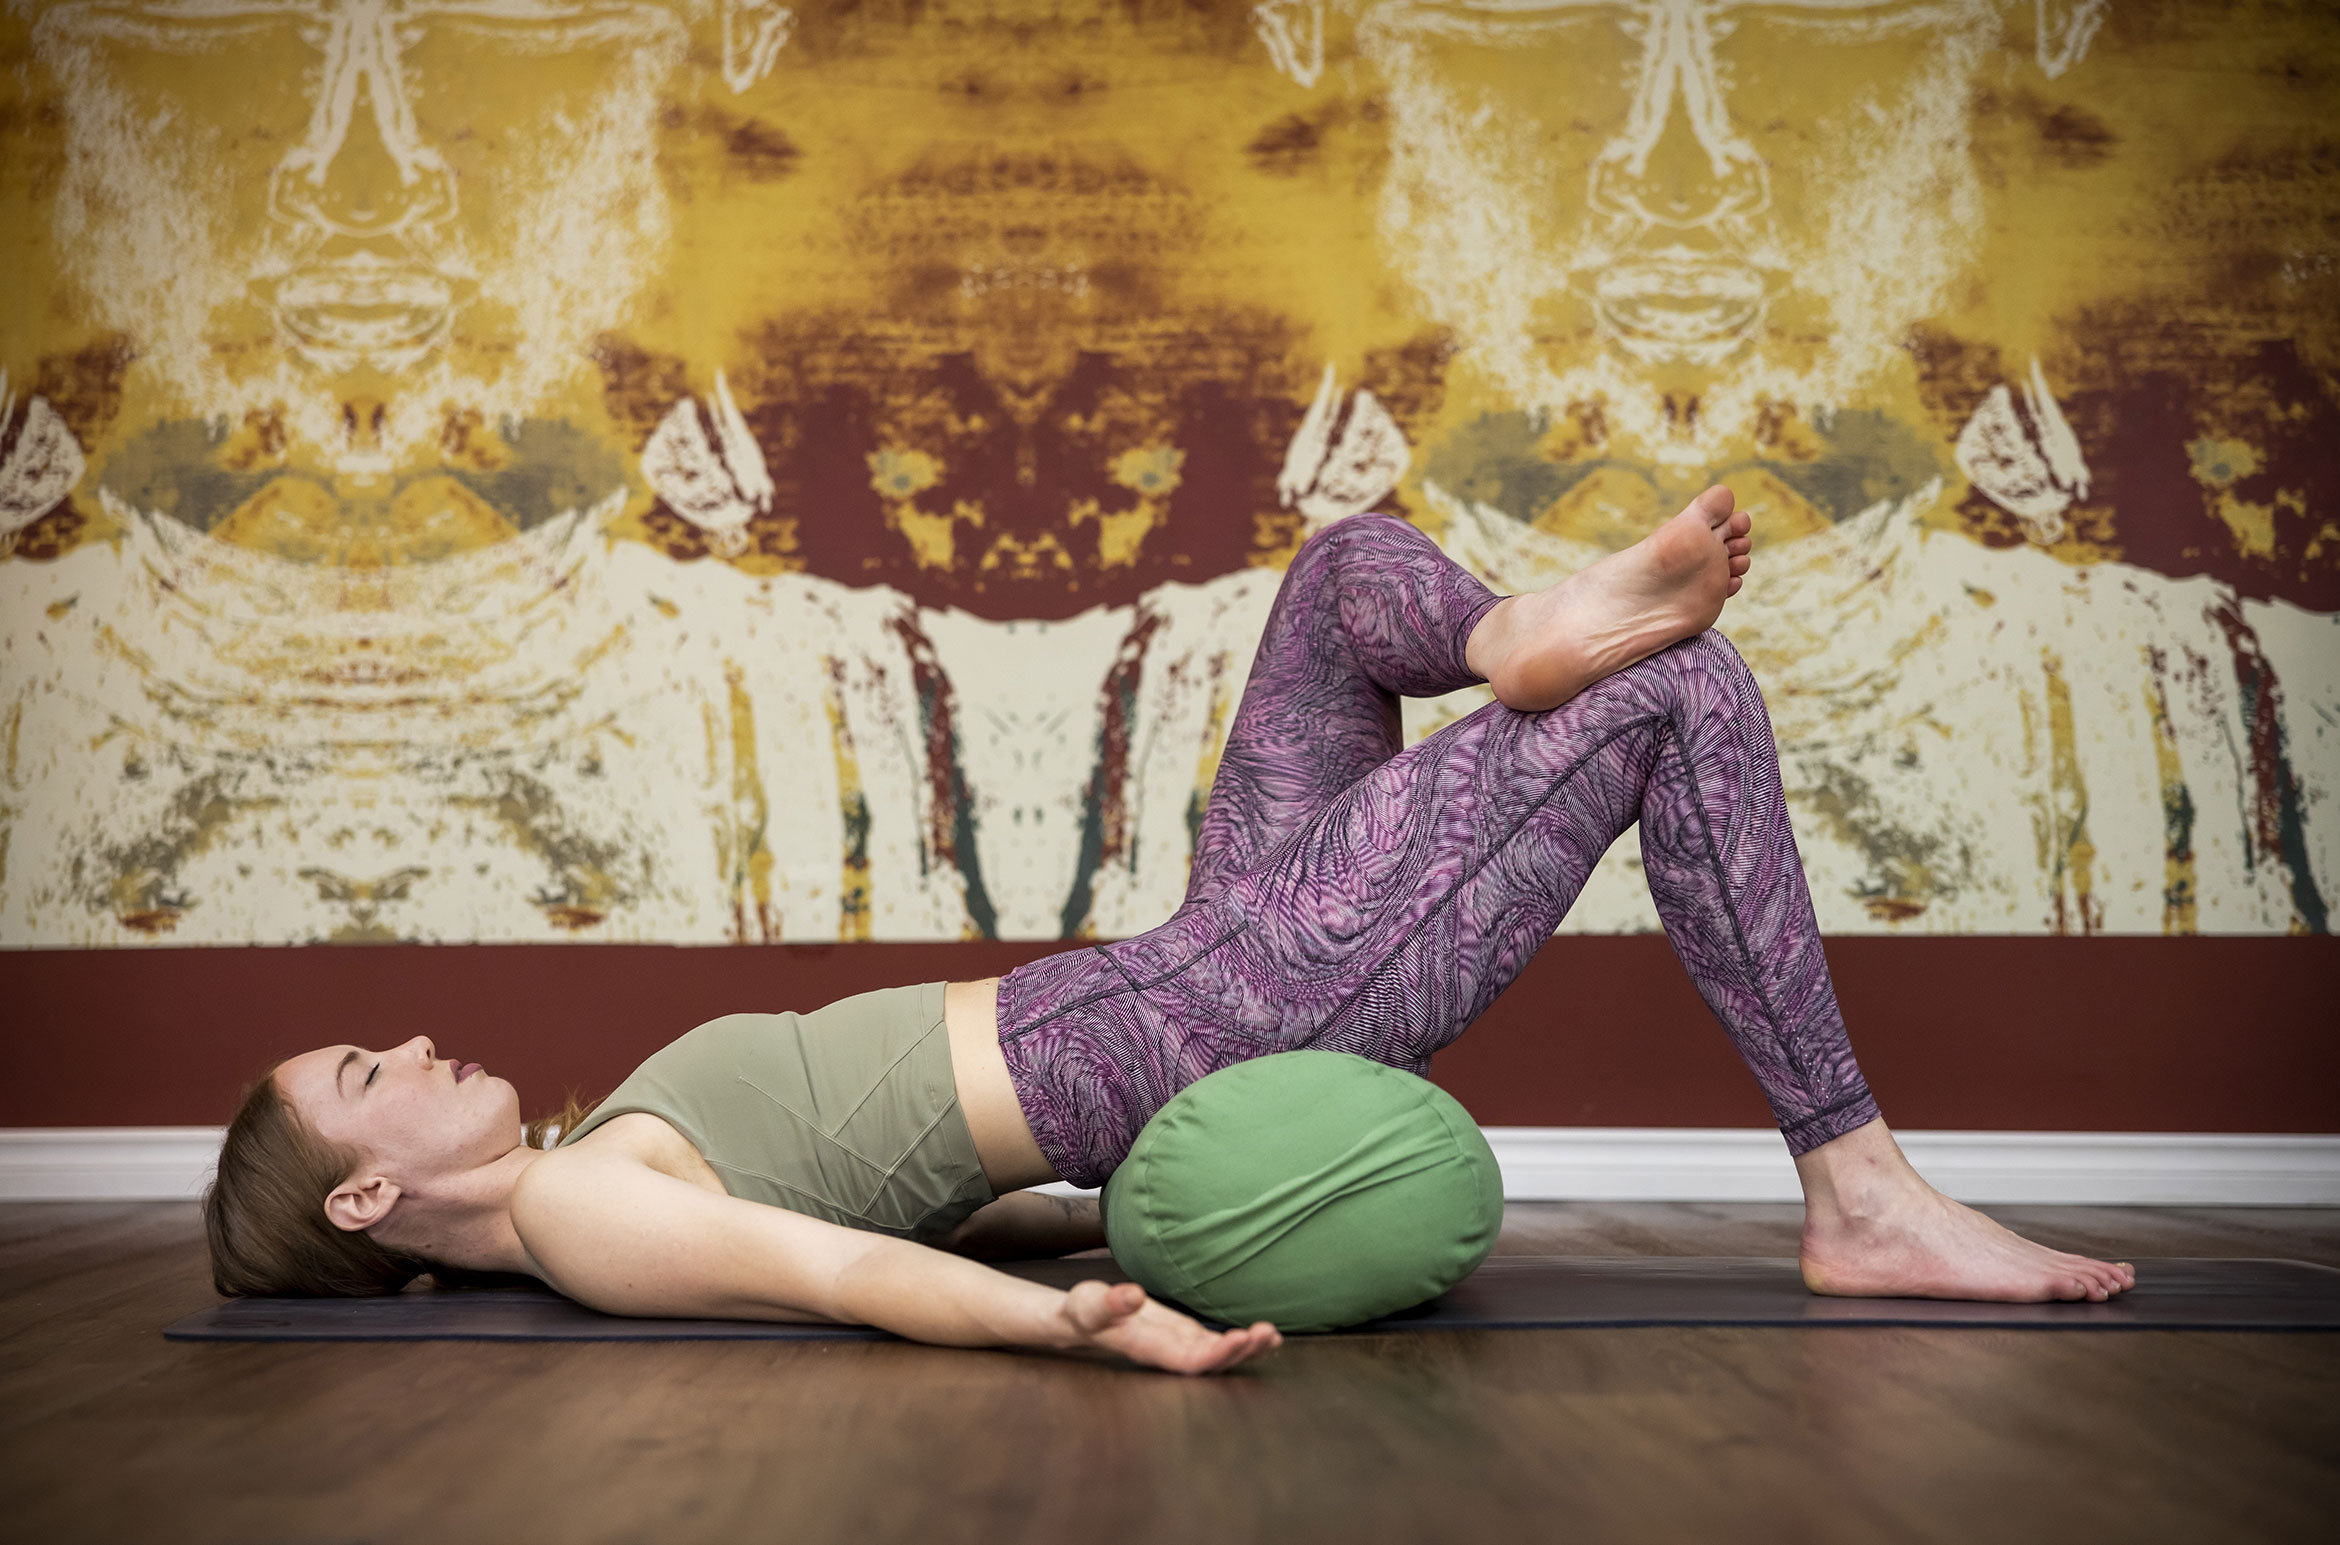
SUPPORTED BRIDGE (with hip opener)
WHY: Because it feels great to release the tissue along the front of the body that has done so much work (abdominal muscles, psoas, etc.), especially because it’s a supported posture which means you can fully relax. When your nervous system needs to shift into a calm state after getting gnarly, this posture will do the trick.
HOW TO: From lying down, take a bolster, a couple of soft blocks or pillows and set them underneath your sacrum (that flat bone at the base of your spine). Keep the back of your neck long and rest your weight on your shoulders with arms at your sides. Bend your knees, and set your feet flat on the mat, hip distance apart. Draw one knee in towards your chest, flex your foot (toes towards shin), then place it just above your (opposite) knee and open up through your hip so your knee releases out wide. Stay for 10 to 30 breaths on each side.
VARIATIONS FOR INJURIES:
- People with neck or back injuries can practice sphinx pose instead. Lay down on your stomach and prop yourself on your elbows. Taking your elbows further away from your body will be more accessible for those with back injuries.
- Eye, ear or sinus issues would likely feel better practicing sphinx pose (described above).
WATCH FOR:
- Hips leaning to one side; evenly settle both sides of your hips on your prop.
- Head tilting back; keep the back of your neck long.
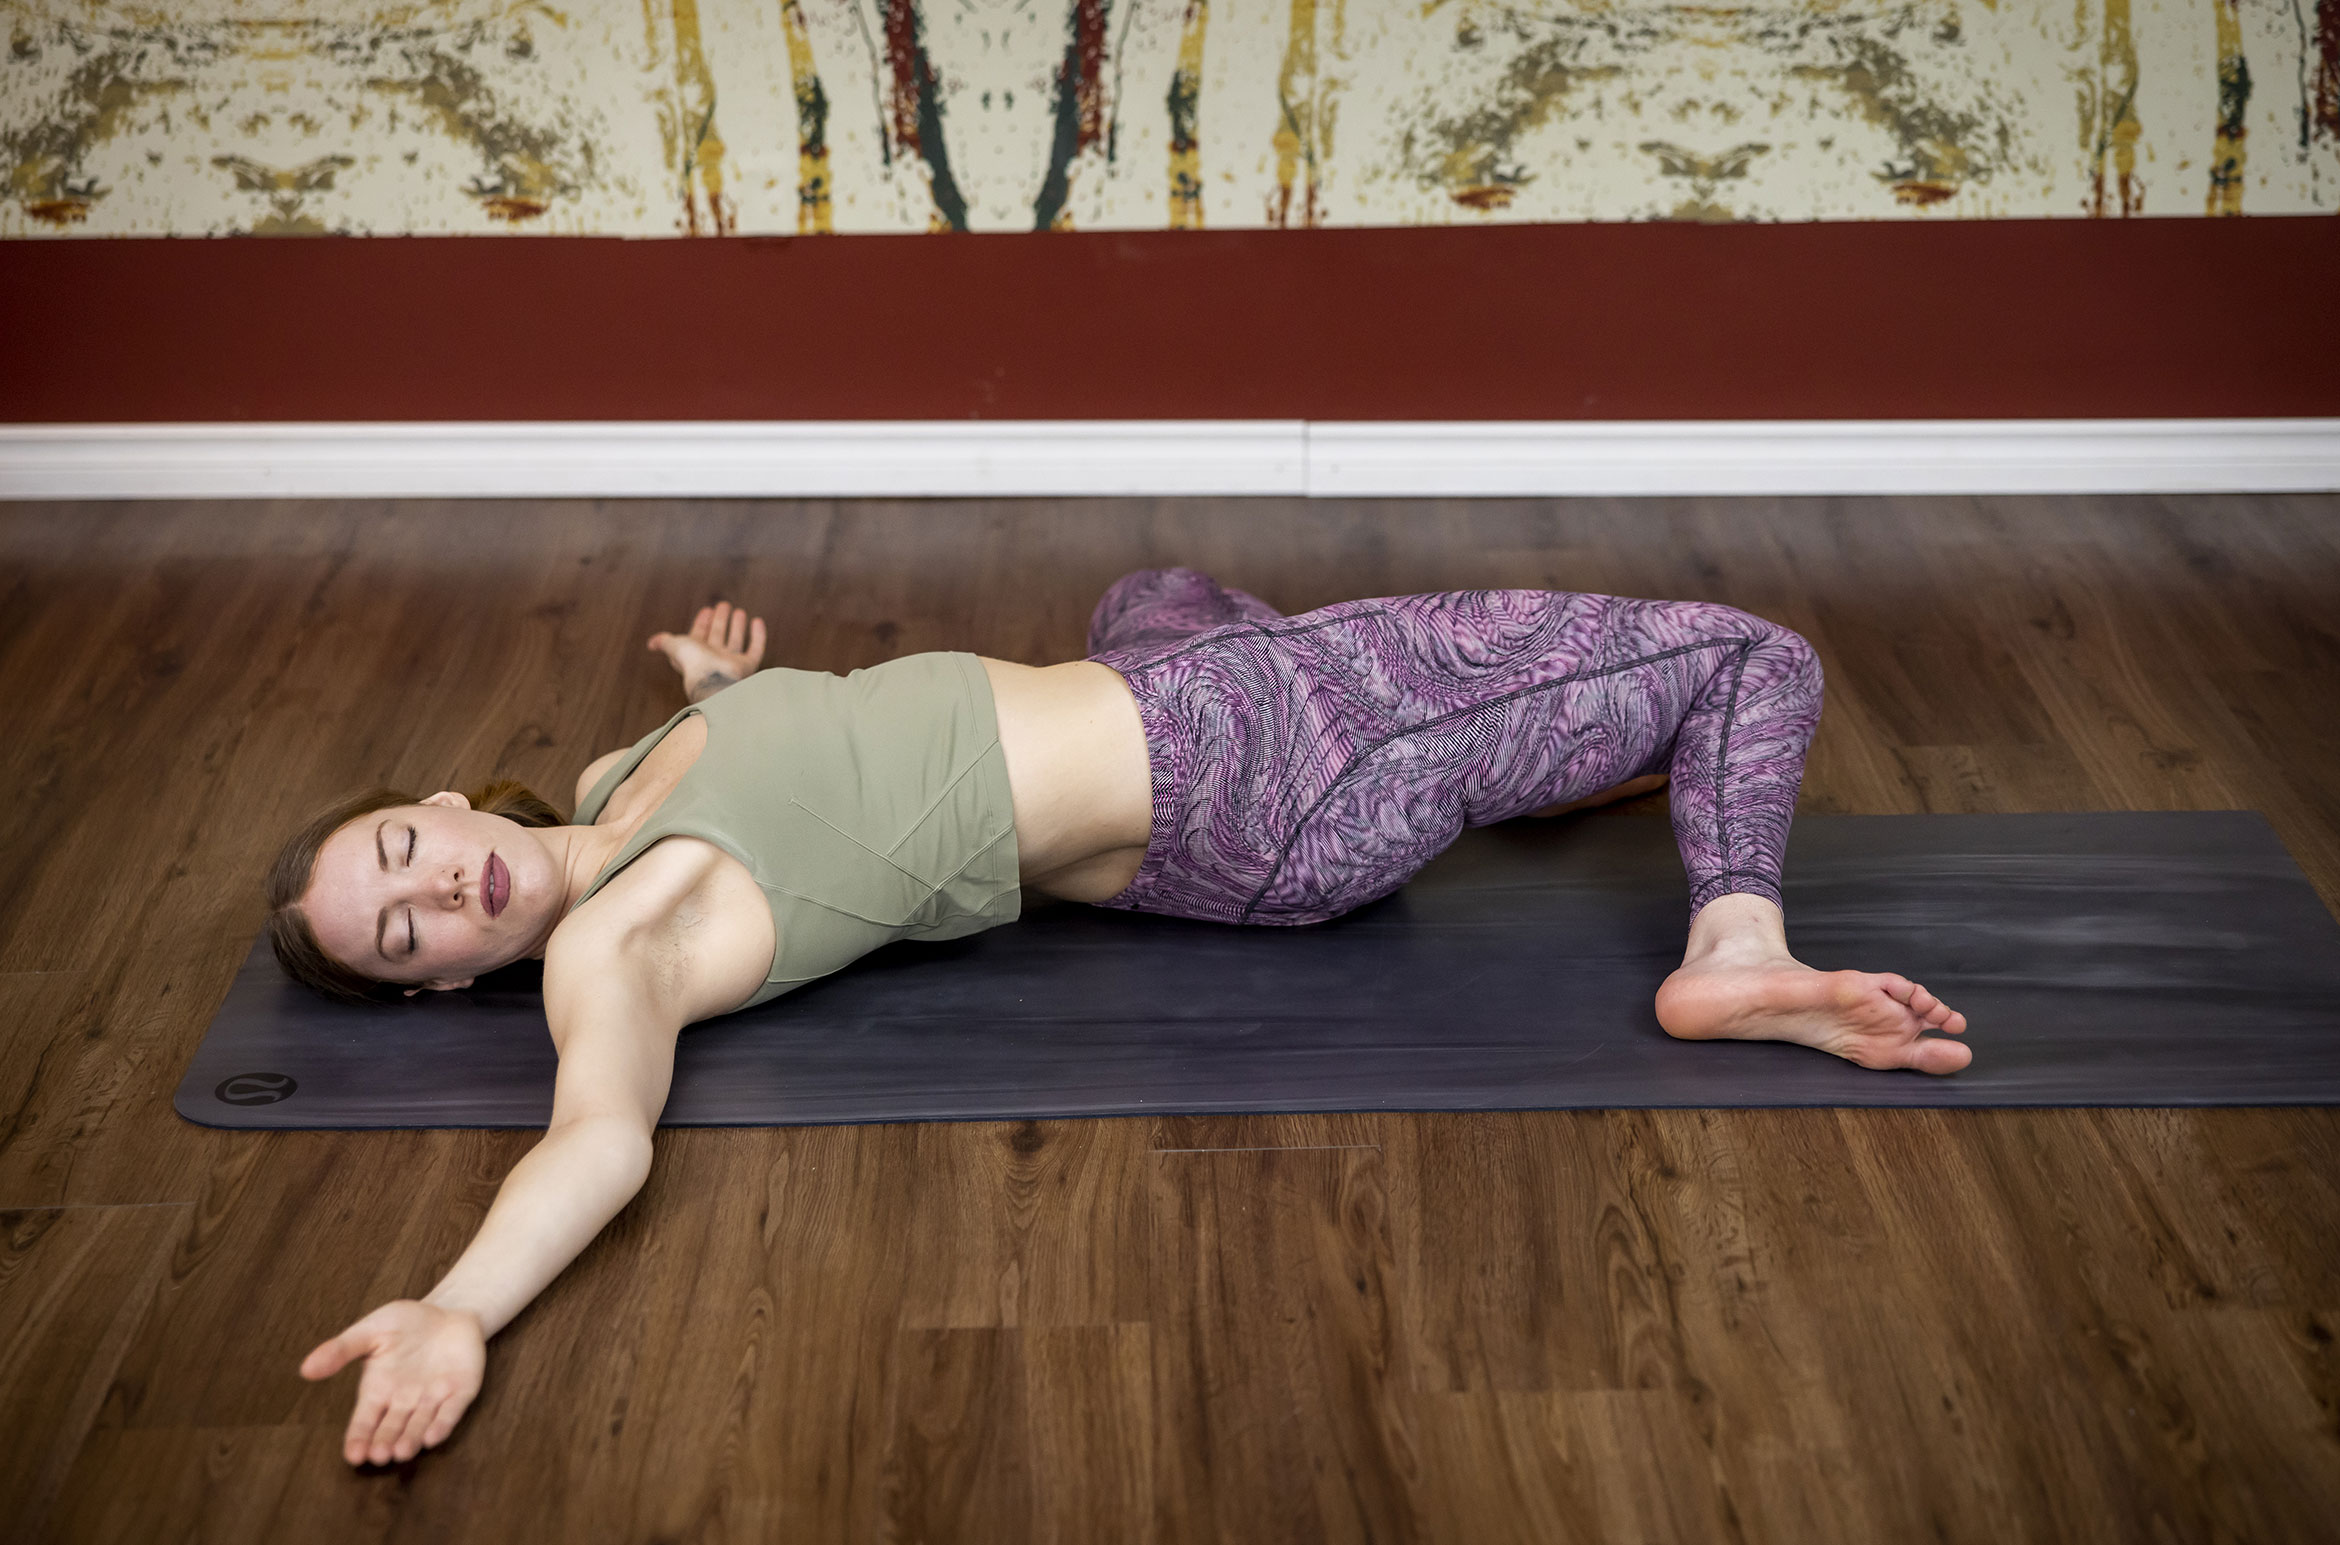
RECLINED TWIST
WHY: This twist variation gets into your thighs (quadriceps), which do a lot of work for us while skiing and snowboarding, not to mention the muscles in your core that work hard to create support. Your legs and spine will thank you for this one.
HOW TO: From lying down, bend your knees and set your feet wide on your mat. As you exhale, take both knees to the right. For stronger sensations, cross your right foot just above your knee. Hands can rest on your belly or out wide. Take your gaze over to the left if it works for your neck. Stay for 10 to 20 breaths on each side.
VARIATIONS FOR INJURIES: Those with back or SI joint injuries might consider propping up their legs (so they’re not hanging in space) with pillows or blankets.
WATCH FOR: Feet set too narrow; take them out slightly wider than your shoulders (or even wider in some cases).
We hope that you have plans to hit the slopes this winter season and that Emily’s stretches and poses prepare your body for lots of fun, minus the aches and pains!
Emily Kane is an ERYT-500, BKin, snowboarder, nature lover, and adventure seeker. You can find her online at @emilykaneyoga, her studio at @yogacarawhistler or get her book The Energy and Art of Restorative Yoga.
This spring, for every third night you book between March 1 - April 30, 2024, receive a free $75 CAD Whistler Après Voucher. Book your summer stay by April 30, 2024, and save up to 30% on lodging and 20% on activities. Plus, you’ll receive a free $150 Activity Voucher on stays of 3 or more nights. Secure your mountain getaway with Whistler.com for personalized service and the local knowledge of our Whistler-based team.