


Every spring and summer, Whistler Blackcomb opens for sightseeing after taking a short pause to service the gondolas and lifts that have been running hard all winter.
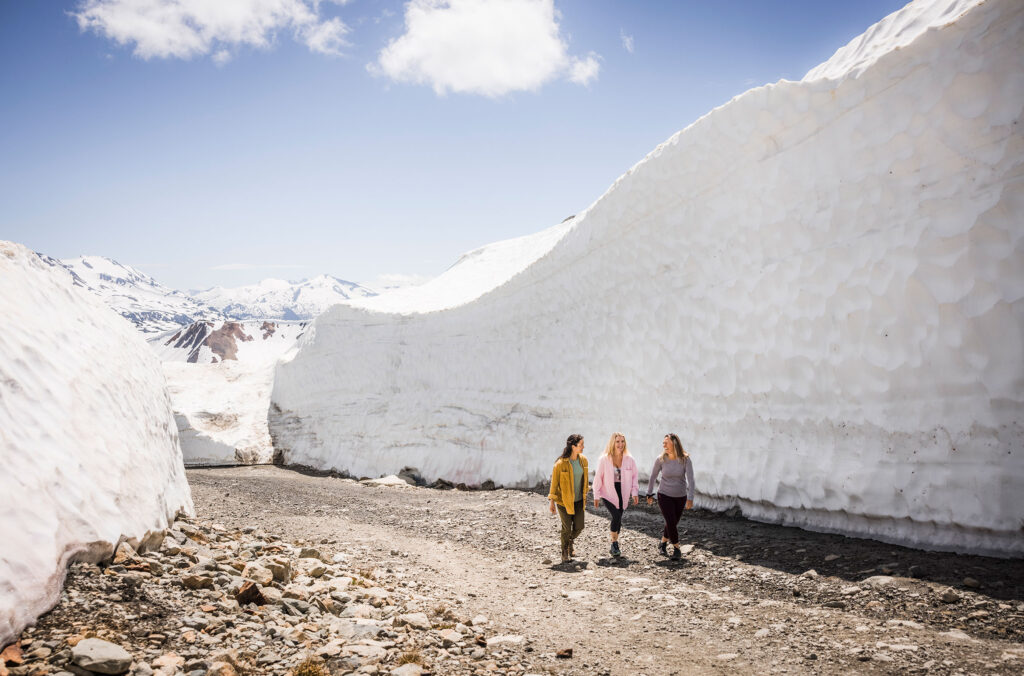
While the valley is mostly melted, the high peaks up top are still blanketed in snow. Early season sightseeing means the alpine hiking trails are still covered, but Whistler Blackcomb has cleared the access road to the top of Harmony Chair, on Whistler Mountain, leaving canyons of snow for you to explore.
The unique sightseeing experience of the snow walls won’t last long, so check out these tips and get up to Whistler to see the snow walls for yourself before they’re gone.
When to Go
The best advice I can give you when dealing with snow and hot weather is the sooner the better. The exact date varies by year, and they’re usually announced on Whistler Blackcomb’s social channels as well as Whistler.com’s PEAK 2 PEAK page, but typically the dates for the snow walls are from mid/late-May to mid-June.
The walls will get smaller every day with the late spring and summer heat, so if this experience is on your bucket list, get up there as soon as it opens! As you plan for your sightseeing trip, be sure to check the hours of operation page to make sure you know what’s happening on Whistler Blackcomb before you book.

How to Get There
Access to the snow walls is included in the Summer Apline Experience Ticket. You can buy tickets for just the day, the full season (opt for this if you’re planning on doing more than one day, as it’s cheaper), or use an Epic Pass for access (it must be a pass valid for next winter season).
How to Plan Your Hike
The snow walls are on Whistler Mountain, so head up via the Whistler Village Gondola or take the PEAK 2 PEAK across from Blackcomb Mountain (always check which gondolas are open before you make your plan).
The ride up the gondola to the Roundhouse Lodge on Whistler Mountain via the Whistler Village Gondola takes about 20 minutes, and there’s plenty to see – keep an eye out for bears and deer, as well as stunning mountain views on the way up. When you get off at the top, stop by the Roundhouse Lodge to use the washroom and stock up on water and food.
On Foot
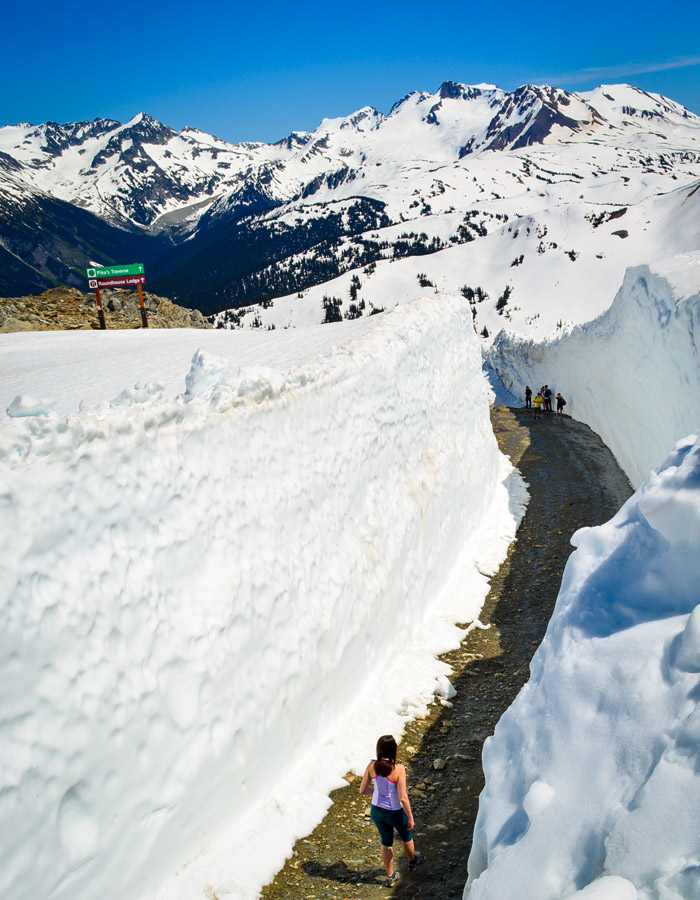
From the Roundhouse Lodge, walk uphill toward the top of the Emerald Express. The trail you are looking for is Pika’s Traverse Road to Matthew’s Traverse Road, which is a distance of 3.2 kilometres (one way). To help you navigate, there are printed maps available on the mountain, or you can see a digital version here with distances and suggested times.
Via Peak Chair
The snow walls extend all the way to the top of Peak Chair, but be warned, Peak Express Chair access does not start until mid-June, which, depending on the year, could be after the snow walls are gone. For the 2025 sightseeing season, the Peak Express Chairlift is due to open on June 14, but please check the hours of operations page in case of any changes.
If the snow walls are still around when the Peak Chair opens, there is a short, 0.6-kilometre hike down to the chairlift, which takes about 10 to 20 minutes. If you choose to download via the Peak Chair, remember that you will have to hike back up that same path, which has an elevation gain of 63 metres.
If you’re travelling with kids, note that the height requirement to ride the Peak Chair is 40 inches (3.3 feet / one metre) and that you can’t ride the chair with a child in any form of carrier. Depending on the fitness levels and ages of people in your group, this may be challenging after a day of adventuring. Make sure to take water and snacks, leave plenty of time and energy to walk back, and take lots of breaks on your way out.
What to Wear
Wearing the right clothes is key to having a great day exploring the snow walls. The weather at the top of the mountain is typically a few degrees cooler than the valley, and wind through the snow walls acts like a natural air conditioner.
When planning your hike, make sure to pack layers for cooler weather, including a warm mid-layer and a windproof outer layer. You can always put them into your pack if you get too warm on the hike up, and you’ll be grateful to have them on the cooler hike down.
Another key to being a happy hiker is good footwear. At a bare minimum, you should wear a pair of running shoes. They don’t need to be fancy, but they should have a decent grip and be sturdy enough that you can’t feel rocks through the soles when you walk.
I’ve seen people wear all kinds of footwear on this hike, including sandals and heels, and those wearers looked miserable. Don’t be that person. Ideally, wear good, supportive hiking boots.
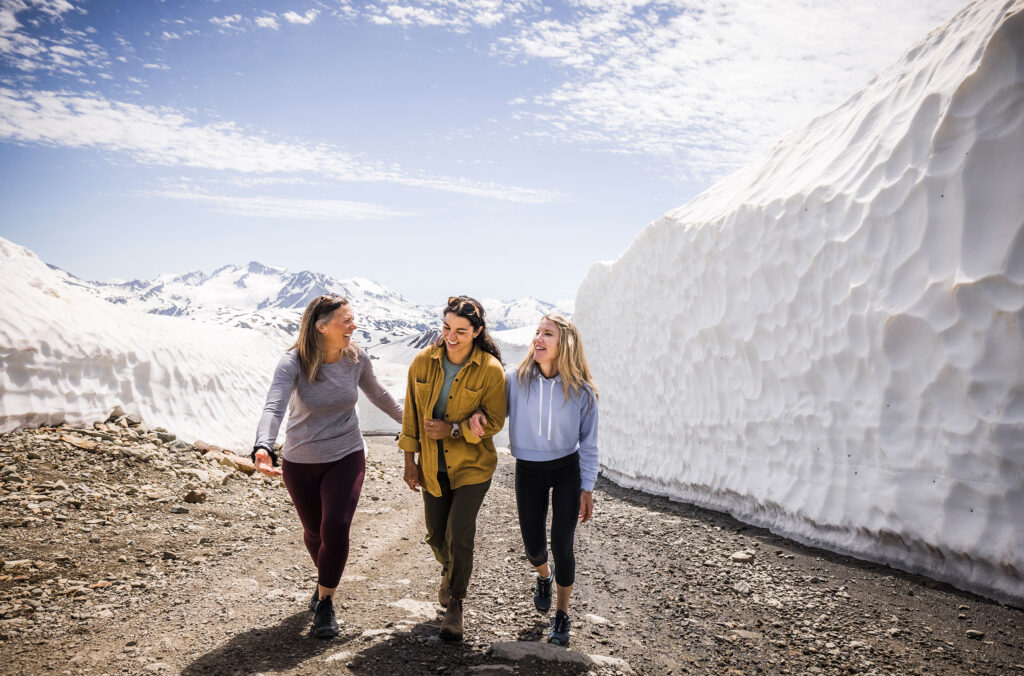
Where to Take the Best Photo
The snow walls are interesting from start to finish, with photo opportunities all along the way, but there are some points that are particularly photogenic. You can find the tallest walls between the Harmony Inukshuk and the top of the Harmony Chair.
Not only are the snow walls tallest there, but there is also a line of sight that looks down the snow walls and through to Blackcomb Mountain. Don’t forget to tag your pics with #OnlyInWhistler to share your shots with fellow adventurers.
For more information on all things outdoors, from hiking to paddling to golf, visit Whistler.com.
Spring savings are calling! There’s so much to see and do in spring, you’ll want plenty of time for fun in the sun. Extend your stay and book midweek for increased savings, with 3 nights starting from $135 CAD per night. Coming during Nourish? Book 3+ nights between May 29 and June 30, 2025, to receive a free $100 or $200 Wellness Activity Voucher, valid for use on wellness activities or Nourish Whistler Wellness Series tickets.
For summer, book ahead and save up to 25% on lodging. Plus, you'll receive a free $100 CAD Activity Voucher on stays of 3 or more nights ($200 for 5 nights). You can also win a summer trip to Whistler with the Escape the Ordinary contest!
Insider Tip: Sign up for Whistler Rewards to access additional savings and exclusive perks.